HappyCardFactory Designs

Dream. Create. Inspire.

  • Shop
  • Facebook
  • Pinterest
  • Twitter
  • Instagram
  • Home
  • Our Store
  • Blog
  • Tutorials
  • 3D Projects
    • 3D Crafts
    • 3D Flowers
    • 3D Letters
  • Contact
  • About Me
    • About Me
    • Disclosure
    • Privacy Policy
  • Join Our Group
You are here: Home / DIY / DIY Embossing Mat for Your Electronic Die Cutter

DIY Embossing Mat for Your Electronic Die Cutter

December 5, 2013 by Rebecca Wagner 4 Comments

zigchri062
Have you ever wanted to use your electronic die cutter to emboss some of those awesome files you own but don’t want to buy those expensive mats to only use once or twice? You may be like me, I had hesitated purchasing an embossing mat because of the price. What if I didn’t use the mat that often? I would constantly worry if my machine settings were off, thus tearing the mat up. It would be money wasted. Figuring out how to make my own could save me some dough, right? Right!  I’ll show you how easy it is to DIY. An embossing mat for your electronic die cutter with materials you may already have on hand. Plus, it can be replaced if tore up for the price of a piece of foam. Which was only 79 cents, by the way. Oh yeah!  Let’s get started.
 
Supplies:
  • Cutting Mat (one with strong adhesive, I used my Gazelle Thick Media mat)
  • craft foam under 2mm thick, preferably 1 mm
  • repositional glue
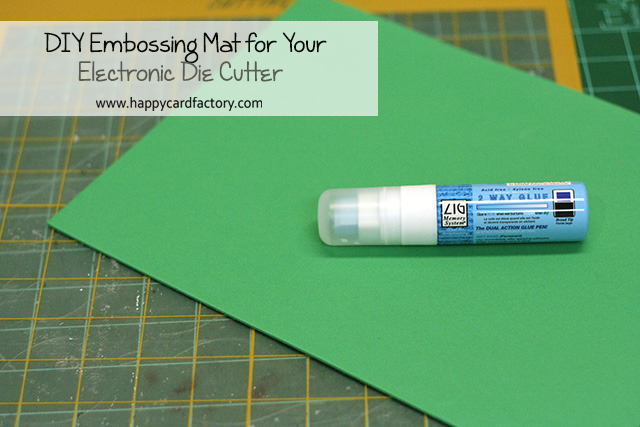
As you can see, I only use three products.  This project is turning out cheaper than I thought. I didn’t even have to run to the craft store. Boy, when I am crafty, I’m reeeeaaally crafty.  
zigchri066
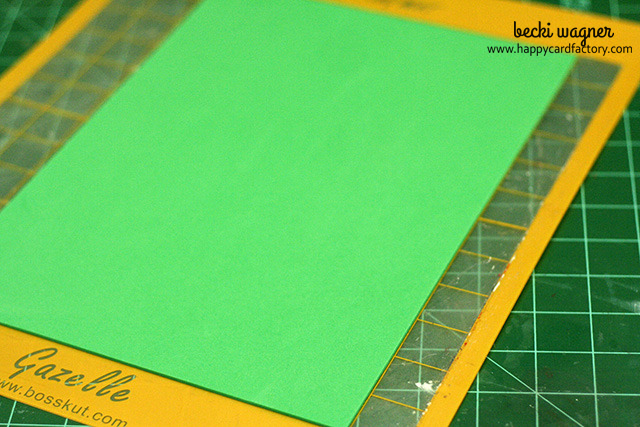
The first thing you want to do is stick your foam to the mat. I got pretty lucky, I just happened to have a Gazelle Thick Media mat lying around not being used. It was perfect for this as it is extra sticky, the foam adhered to the mat extremely well with a little brayering. I have not tried this with a standard mat, but I am sure if it is not sticky enough some duct tape or glue will work fine. If you do use glue, I would recommend something like I use here that is repositionable. That way if you need to replace the foam or just use the mat, pull it up and add another piece. Notice I offset my foam a little from the corner. It is a 9×12 piece and it needs to pass between the rollers that I will move when using this mat. The foam is thick and those rollers will make some nasty indents in my project if I don’t take precautions.zigchri078
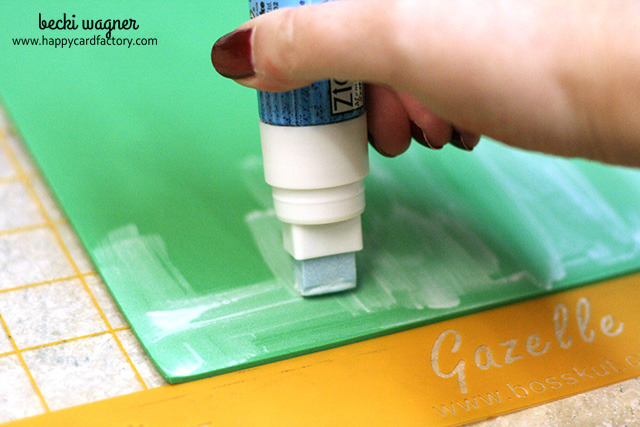
Once my foam was attached, I started applying glue to the entire piece. I love the ZIG 2-Way because it has a great tack without tearing my paper. Again, you can use any repositionable glue or tape just make sure it does not have a permanent bond.zigchri080
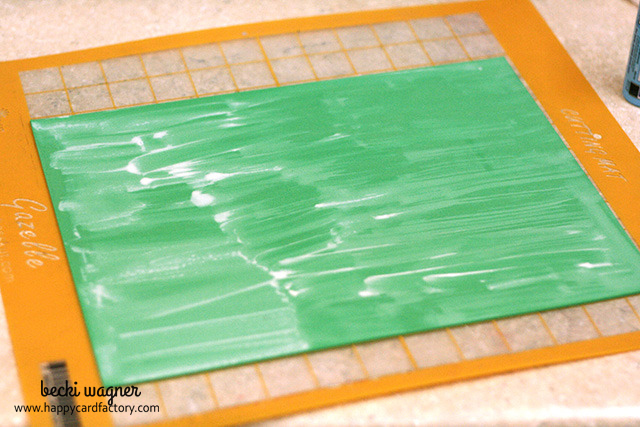
Once the glue is dry you won’t see anything but a slight shine on the foam. It was weird that the foam foamed up the glue. Never saw that happen before but it doesn’t affect the results at all. I just mention it in case you wonder what in the world is happening when you try it.
 
That’s all there is to making your own embossing mat for your electronic die cutter. Pretty simple, huh? Cheap, too. Make sure you check out my project showing if my frugality panned out later in the week. You will be pleasantly surprised!
 

Filed Under: DIY, embossing, tutorial

« Christmas Tree Treat Boxes
Emboss With Your Electronic Die Cutter! »

Comments

  1. Jackie says

    January 22, 2014 at 1:15 pm

    I am new to this group and reading your directions (embossing) you mentioned a Gazelle mat. I have never heard of this. Where can I find more info.
    Regards,
    Jackie

    Reply
  2. Becki says

    January 22, 2014 at 3:04 pm

    The yellow Gazelle mat I was referring to is a mat to use with the electronic die cutting machine the Boss Kut Gazelle. It is their heavy duty, extra sticky mat. The machine is available for purchase at http://www.bosskut.com. Hope this helps and if you have any questions, let me know! šŸ™‚

    Reply
  3. genny says

    November 7, 2020 at 1:06 am

    hi, do you know where can I buy some Replacement Cutting Bladed for the gazelle? thanks

    Reply
    • Becki says

      February 11, 2021 at 11:34 am

      Hi, Genny.

      I don’t know where you would get them since they went out of business. I haven’t used my Gazelle in probably six years. Did you try eBay?

      Reply

Leave a Reply Cancel reply

Your email address will not be published. Required fields are marked *

This site uses Akismet to reduce spam. Learn how your comment data is processed.

About the Designer

Hi, I'm Rebecca. I am a child of God. A loving wife of 29 years. A boy mom. A collector of gadgets, gizmos, and superhero action figures. Making the world more organized one planner at a time. Read More…

  • Facebook
  • Instagram
  • Pinterest
  • Twitter

Looking for Something?

Categories

Copyright

You are welcome to feature or share any article, as long as you use only one image and link back to the specific post. You may NOT edit, crop, remove my watermark, or change my images in any way without written permission.

Republishing posts in their entirety is prohibited. If I somehow produce something that inspires you to create your own, please credit me and link back to my site. Thanks!
  • Blog
  • Home
  • Tutorials
  • About Me
  • Contact Me
  • 3D Projects
  • CGP VIP Group

Join us on Instagram

It’s a tabbing tab kind of day. #smallbusiness It’s a tabbing tab kind of day. 

#smallbusinesslife #citygirlplanners #stationeryshop #stationery #motermpocketplanner #filofaxlove #planner
šŸ‘» Don’t get ghosted by your to-do list! This šŸ‘» Don’t get ghosted by your to-do list!

This is your last chance to grab our Buy 3, Get 1 Free deal on planner refills.

Mix calendars and functional refills, then use code B3G1 at checkout.

Find it on the website under Planner Refills — you know the drill. šŸ’…

šŸ•› Ends October 31 at midnight — don’t let it slip through your (candy-sticky) fingers.

#plannercommunity #planners #plannerlove #plannerinserts #plannerpages #organizedlife #planninginspiration #stationerylove #plannerlayout #citygirlplanners #plannerrefills #b3g1 #productivitytools
Some days, ā€œthrivingā€ is just too high a bar. Some days, ā€œthrivingā€ is just too high a bar.

This one’s for the days you’re still here — and that’s something. šŸ’—

Coming soon to CityGirl Planners.

#citygirlplanners #plannercommunity #stationerylove #mentalhealthplanner #selfcarejournal #plannersetup #plannerrefills #shopsmall #comingsoon
We got a sampler roll of pink foil… and obviousl We got a sampler roll of pink foil… and obviously, we had to see what it could do. ✨
So we ran a few calendars through, and they turned out gorgeous.
If you’ve been wanting foil, now’s your shot — but heads up, this one’s super limited.
Once this pink’s gone, it’s gone for good.

šŸ‘‰ Grab your favorite before it’s history: [link in bio]

#plannercommunity #plannerrefills #stationerylove #foilplanner #citygirlplanners #limitededition #pinkfoil #plannersetup #stationeryshop #shopsmall
✨ Meet our new Gold Satin foil! We retired the o ✨ Meet our new Gold Satin foil!
We retired the old gold after too many print headaches (RIP, shiny troublemaker). This new satin finish keeps that luxe vibe but actually shows the lines—no more disappearing print when the light hits it. Sometimes change really is golden.

#citygirlplanners #goldfoilinserts #foilplanner #plannercommunity #plannerinspo
Trick or treat, planner babes šŸŽƒ Buy any 3 cale Trick or treat, planner babes šŸŽƒ

Buy any 3 calendars or functional refills and your 4th Functional Refill is FREE!

Just use code B3G1 at checkout.
Mix, match, organize, repeat.

🩷 Available only on our website — link’s in bio!
šŸ‘» Offer ends October 31st.

Only on CityGirlPlanners.com

#CityGirlPlanners #PlannerLover #PlannerCommunity #StationeryLovers #PlannerSale #Buy3Get1Free #PlannerRefills #OctoberVibes #FilofaxPocket #MotermPlanner #LVGMAgenda #LVAgenda
It’s officially October and I’m flipping throu It’s officially October and I’m flipping through customer faves—Personal size tabbed dividers. They’re not cut yet (hot off the press!), but you get the idea. Want tidy sections before the candy hits? Link in bio.

#spookyseason #octobersetup #plannerdividers #tabbeddividers #personalplanner #ringbinder #plannercommunity #filofaxlove #moterm #lvagenda #citygirlplanners
I decided to change up our thank you stickers to b I decided to change up our thank you stickers to be more on brand. I’m digging them. 

#citygirlplanners #plannercommunity #plannerlove #stationerylove #citygirlplans #brandingandmarketing #plannerprops #planningnerd
When your equipment warns you that it will bite if When your equipment warns you that it will bite if you get too close, take heed. Especially when you don’t have any bandaids. It will take the entire pad of your finger off. šŸ¤£šŸ¤¦šŸ»ā€ā™€ļø

#safetyfirst #maximumoverdrive #ghostinthemachine #terminators #machinestryingtokillus #citygirlplanners
Follow Us!

Categories

Archives

Copyright © 2025 · HappyCardFactory Designs