HappyCardFactory Designs

Dream. Create. Inspire.

  • Shop
  • Facebook
  • Pinterest
  • Twitter
  • Instagram
  • Home
  • Our Store
  • Blog
  • Tutorials
  • 3D Projects
    • 3D Crafts
    • 3D Flowers
    • 3D Letters
  • Contact
  • About Me
    • About Me
    • Disclosure
    • Privacy Policy
  • Join Our Group
You are here: Home / crafts / Emboss With Your Electronic Die Cutter!

Emboss With Your Electronic Die Cutter!

December 6, 2013 by Rebecca Wagner 8 Comments

zigchri086
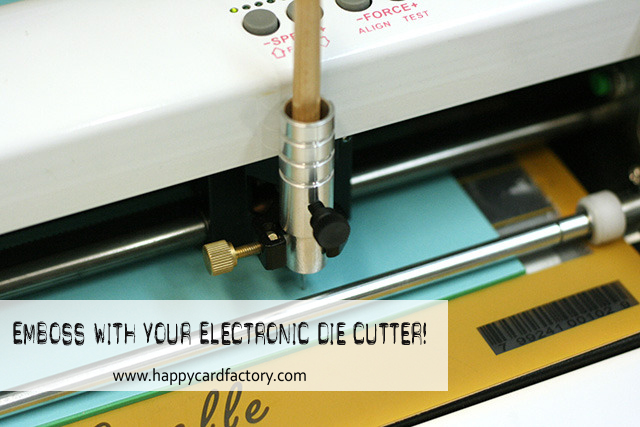
The cost of metal dies are very cost prohibitive to me. Every time I go to the store and see a design that embosses and cuts at the same time, I am drawn to purchase it. Then I fight with myself because I have way, way too many cut files, and reason that I really don’t need the embossing feature. Don’t get me wrong, I love the look, but can always talk myself out of it. Well, I found a way to use what I already own and get pretty darn good results. In this tutorial, I will show you how to emboss with your electronic die cutter!
 
While using your electronic die cutter with an embossing mat and tool will not give you the deep impression you can get from a folder or a dual duty metal die, it’s still worth playing around with. This technique is especially cool on those designs that have a bonus layer like the one I use here. Let me show you what kind of results you can get.
 
Supplies:
  • embossing mat 
  • embossing tool (Chomas adjustable pen holder with stylus)
  • Seasoned Christmas Cut It (mittens) by Lettering Delights
  • cardstock
Since there are such a variety of machines with different designs on the market, I can’t possibly go over how you would do this with your particular machine. What I can do is explain what I did with mine and hope that sparks an idea that will work with yours. My machine of choice for this project was the Gazelle. Boss Kut and most machine manufacturers have an OEM embossing tool available. I do not have one for my Gazelle so I improvised. If you have one, you can move on to the next step. If not, all is not lost. Do you have a stylus laying around? Grab one and plop it into your machine. I have a set of them in different end sizes for flower making. It works out better because I am not stuck with a single line width. I have ten to choose from. I love options!
 
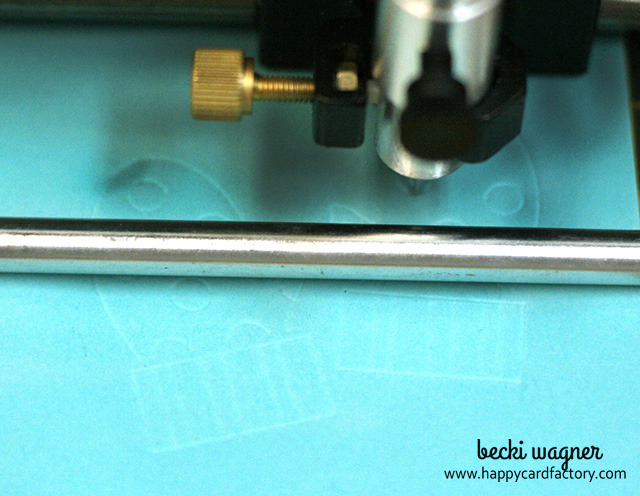
As you can see by the picture the blade mechanism has a screw that holds the blade holder. What’s great is that it can hold almost any pen or marker without the additional cost of a separate holder. The bad thing is that you have to play with offset if you want the pen centered. I’m lazy and didn’t want to mess with possibly having my embossing too close to my cut line so I used my pen holder. You may have a swing arm and need a pen holder. There are a few third-party ones available that fit a great number of machines. Use whatever works for you to achieve an emboss. A word of warning, check with your machine’s manufacturer to make sure you are not voiding your warranty by using a third-party product.
 
zigchri091The mitten cut file is a simple silhouette shape with a decorative bonus layer. I hid the outline layer and “cut” the bonus layer using the stylus in place of my blade. I started on a lower force and bumped it up till I saw a nice impression. You need to start with a lower force otherwise if it is too high it will tear into your paper and mat. Ask me how I know.  :/
 
zigchri097
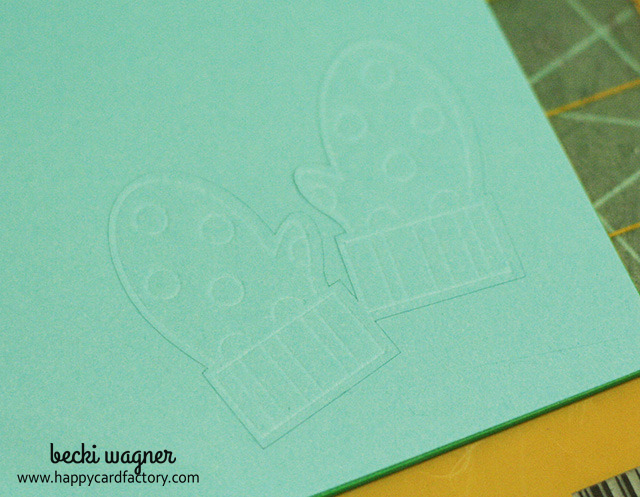
Don’t be afraid to go over the embossing layer again with a multi-cut at the same force till you get your desired look. Once the embossing is to your liking, replace the tool with your blade and cut out the silhouette layer. Note, if you have your blade set correctly, it will just barely scratch the foam like it would on your regular mat.
 
zigchri098Nice clean cut and embossing. Did we really just use our machine to make miracles happen? Why yes, yes we did! 
 
zigchri104
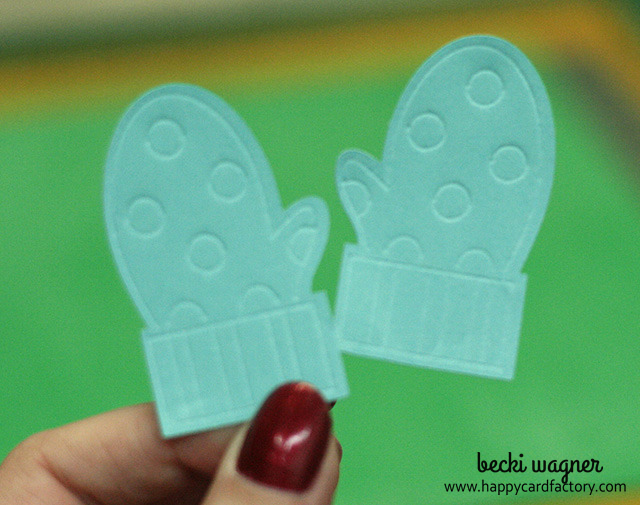
You may not feel the same, but I was pretty excited I figured this out. I mean, I don’t like to spend the money on a technique I may only used once or twice in my craft life. This way I can still do a fancy trick or two with very little cost to me.
 
Now put your new technique to work on a fabulous element for your next project. Ah, makes a crafter proud when she can add another technique to her arsenal, doesn’t it? Particularly, if we saved money and looked good doing it!


Filed Under: crafts, Pen Feature, tutorial

« DIY Embossing Mat for Your Electronic Die Cutter
Ribbon Handle Boxes »

Comments

  1. Joanna says

    December 20, 2013 at 4:03 pm

    Great tutorial Becki and love the money saving embossed technique.

    Reply
    • Becki says

      December 20, 2013 at 5:31 pm

      Thanks, Joanna!

      Reply
  2. Amy Chomas says

    December 22, 2013 at 4:21 pm

    Looks great! Thanks so much for sharing!

    Reply
    • Becki says

      January 1, 2014 at 7:19 pm

      Thanks, Amy!

      Reply
  3. Mary Roberson says

    December 27, 2013 at 11:45 am

    Awesome! Now, why didn’t I think of that? Thanks for sharing this technique with us.

    Reply
    • Becki says

      December 27, 2013 at 11:51 am

      You’re welcome, Mary!

      Reply
  4. ClaraLuna says

    January 3, 2014 at 3:44 am

    Thanks for sharing this tips with us ! Do you stick your paper on your embossing map ?

    Reply
    • Becki says

      January 3, 2014 at 12:54 pm

      Yes, you would stick your paper to the foam of your embossing mat. 🙂

      Reply

Leave a Reply Cancel reply

Your email address will not be published. Required fields are marked *

This site uses Akismet to reduce spam. Learn how your comment data is processed.

About the Designer

Hi, I'm Rebecca. I am a child of God. A loving wife of 29 years. A boy mom. A collector of gadgets, gizmos, and superhero action figures. Making the world more organized one planner at a time. Read More…

  • Facebook
  • Instagram
  • Pinterest
  • Twitter

Looking for Something?

Categories

Copyright

You are welcome to feature or share any article, as long as you use only one image and link back to the specific post. You may NOT edit, crop, remove my watermark, or change my images in any way without written permission.

Republishing posts in their entirety is prohibited. If I somehow produce something that inspires you to create your own, please credit me and link back to my site. Thanks!
  • Blog
  • Home
  • Tutorials
  • About Me
  • Contact Me
  • 3D Projects
  • CGP VIP Group

Join us on Instagram

One of our OGs—still going strong. 🐾

These “My Pet is Home Alone” cards have been riding with us since the very beginning—we’re talking day-one, kitchen-table-startup vibes. And guess what? They’re still one of our top sellers over a decade later. Because protecting your fur (or feather or scale) babies never goes out of style.
💛

#PlannerEssentials #PetEmergencyCard #CityGirlPlanners #Since2014 #PetParentsUnite #StillGoingStrong #SmallBizOG #PetLoversPlanner #StationeryWithPurpose
✨Bookworms, unite!✨ Our redesigned Book Review ✨Bookworms, unite!✨ Our redesigned Book Review insert is here—and she’s prettier than a library on wheels. Keep track of every plot twist, favorite quote, and fictional crush with a layout that actually makes sense (and looks cute doing it).

#bookreviewinsert #readingjournal #discplanner #plannerinspo #stationerylove #booknerd #currentlyreading #plannerpeace #citygirlplanners
🎇 July dashboard locked and loaded. Red and blu 🎇 July dashboard locked and loaded.
Red and blue glitter pen, naturally, because this month’s got fireworks, deadlines, and apparently…roller skates.
This is my bound planner living its best life in full-on hustle mode.

Tabs: hot pink and helpful.
Goals: somewhere between insert idea here and “stop starting fights.”
Mood: handled (barely).

#julyplanner #boundplanner #plannerdashboard #glitterpenpower #stationerycrush #plannerlayout #citygirlplanners #plannergirlvibes #desksetupgoals #plannerinspo #organizedchaos #getstuffdone
✨Calling all desk divas and binder bosses… Ou ✨Calling all desk divas and binder bosses…

Our Girl Boss planner dividers in Personal size just clocked in.

💼 Teal bags, pink vibes, and a whole stack of “watch me do it anyway.”

No foil, no fluff: just high-glam hustle for your 6-ring slaybook.

Binder shown: Moterm (she’s just here for the photo shoot).

#girlbossplanner #plannerdividers #personalplanner #plannerinsertstyle #plannerglam #plannerinspo #bossbabevibes #tealobsessed #stationerycrush #discobindingnotincluded #citygirlplanners #planninginstyle
Plot twist: You’re not disorganized, you’re ju Plot twist: You’re not disorganized, you’re just trying to do 47 things without writing any of them down.

Grab a planner insert. Save a meltdown.

#CityGirlPlanners #PlannerLife #ProductivityWithAttitude #OrganizeYourChaos #FoiledPlannerInsert #JulySpread #GoldFoilPlanner #PlanWithStyle #PaperObsession #StylishPlanning #WriteItDown
I’ve ignored it. Denied it. Pretended it was ‘ I’ve ignored it. Denied it. Pretended it was ‘not that bad.’ But guess what? It is that bad. New insert drop from the Snark Pack™: Can’t Ignore This Again. Because if I’m gonna spiral, I might as well document it in style.
🌀📓

 #SnarkPack #PlannerInsert #RealTalkRefills #CityGirlPlanners #HotMessExpress #StationeryWithAnAttitude #stationerylove #plannerhumor
Just over here writing rainbow-colored lies into m Just over here writing rainbow-colored lies into my planner so I can feel accomplished.

The Obsessive List Maker insert isn’t judging. She’s enabling. What’s one thing you’re putting on your list just to cross it off?

#citygirlplannersinserts #plannervibes #rainbowstationery #fridayplanning #plannerhumor #colorcodedchaos #paperandplans #citygirlplanners #filofaxmalden
🌀 THE OVERTHINKER’S LOG A safe space for spir 🌀 THE OVERTHINKER’S LOG
A safe space for spirals, assumptions, and imaginary arguments you definitely won.
⠀
Break down the mental chaos with prompts like:
— What actually happened
— What I made up about it
— How I might be overreacting (but also maybe not?)
⠀
Validation meets self-awareness… reluctantly.
⠀
#overthinkerslog #plannerhumor #snarkpack #mentalmayhem #citygirlplanners #emotionallyexhaustedbutorganized
🧠 FUNCTIONAL? DEBATABLE. A weekly layout for wh 🧠 FUNCTIONAL? DEBATABLE.
A weekly layout for when you’re pretending to have it together—but not too hard.
⠀
✅ Things I might do
❌ Things I will absolutely avoid
☕ Caffeine levels? Questionable.
💀 Motivation? Bribed at best.
⠀
Plan-ish your week without all that “productive” pressure.
⠀
#functionalplanner #snarkpack #weeklylayout #plannerhumor #citygirlplanners #mentalmessbutmakeitcute
Follow Us!

Categories

Archives

Copyright © 2025 · HappyCardFactory Designs