HappyCardFactory Designs

Dream. Create. Inspire.

  • Shop
  • Facebook
  • Pinterest
  • Twitter
  • Instagram
  • Home
  • Our Store
  • Blog
  • Tutorials
  • 3D Projects
    • 3D Crafts
    • 3D Flowers
    • 3D Letters
  • Contact
  • About Me
    • About Me
    • Disclosure
    • Privacy Policy
  • Join Our Group
You are here: Home / Christmas / Let It Snow Mini Sign

Let It Snow Mini Sign

December 27, 2012 by Rebecca Wagner Leave a Comment

Now, I know I have told you before I am terrible at lettering by hand. Hopefully with this project it will not take away from the over all enjoyment for my fellow crafters. Even though my hand writing stinks, I think my little sign is adorable. Perfect for that friend who is into the country chic look to hang on her door or kitchen window.

My sign was very easy to make. Let me show you how to make one of your own with supplies you may already have in your craft room.

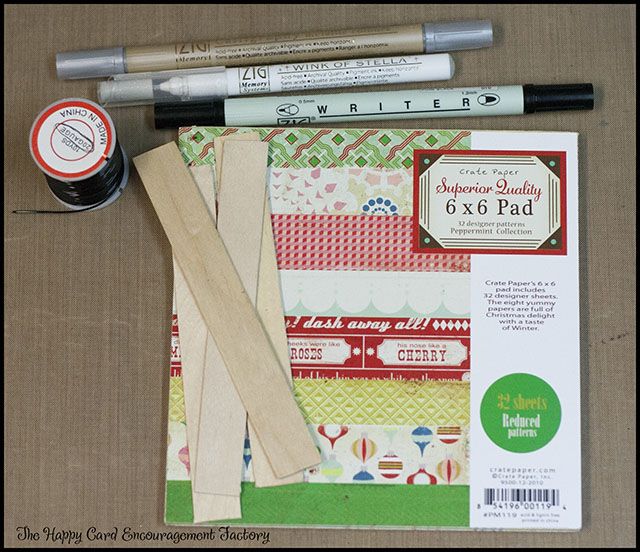
First, pick a sheet of your favorite paper. I like to use the 6×6 pads as they have a small pattern print on them. Which is perfect for a small scale project like this. Next grab some 20 gauge craft wire, glue, 4 craft sticks with the ends cut off, and finally a few different flavors of markers. I have my trusty Kuretake ZIG! Writer in black, Wink of Stella, and Calligraphy Metallic pens to add shimmer, shine and depth to the sentiment. Each one of these pens can be found together in the Memory System Starter Set for maximum value.

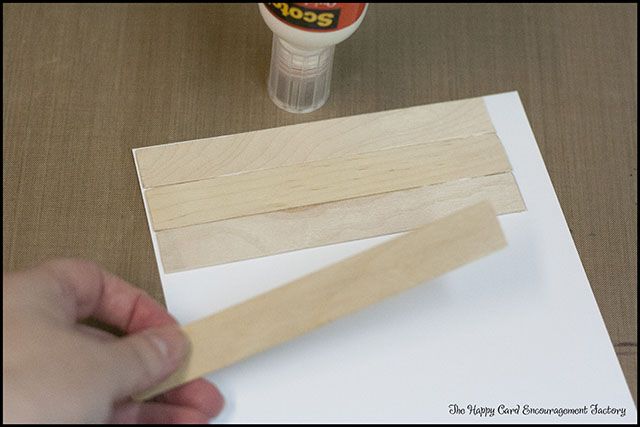
On the backside of your paper, glue all sticks down. Make sure you put a bead of glue on the edge of the stick so it will adhere to the stick above. Once dry, trim the paper to the size of the sticks.

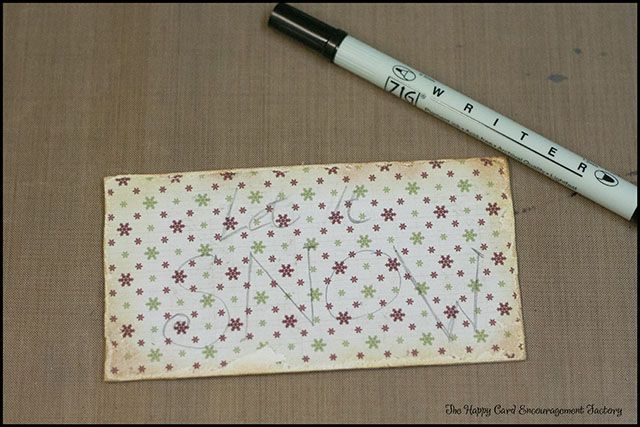
After daubing the edges with ink to give an aged look, I penciled in my sentiment. I used the pencil before because I just don’t trust my handwriting. Then take your Writer (using the 1.2 mm side) once you like how it looks and trace. Going over and thickening the lines where you want to add a little more style. I traced again with the Wink of Stella pen to make the black shimmer, then added depth to the letters with the silver Calligraphy Metallic pen.

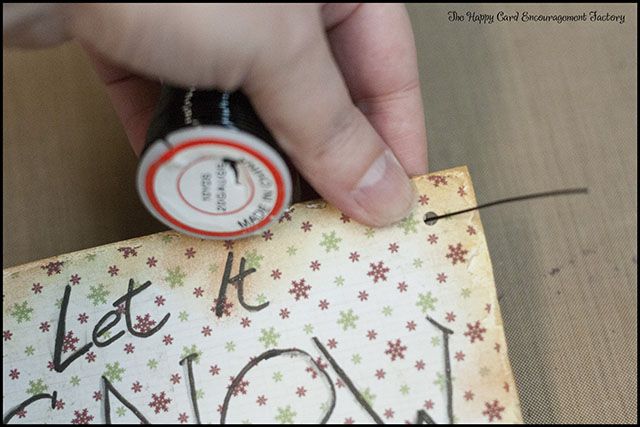
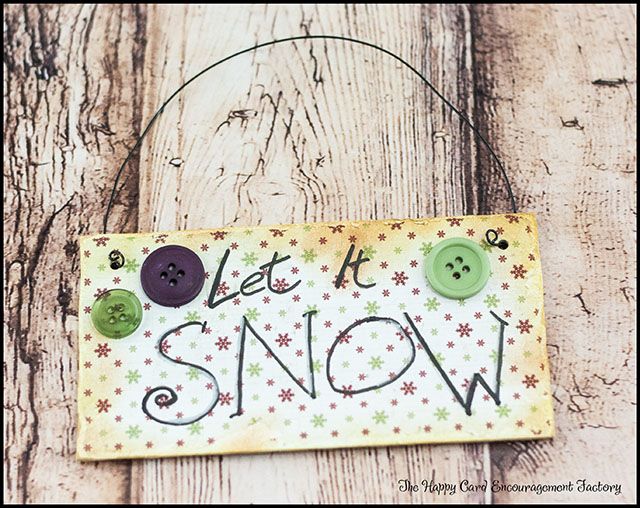
To get my mini sign to hang, I punched a hole on each side. Thread the wire through and twist the ends to keep them secure.

I finished it off with a few buttons to match the paper. It would also look cute with a couple die cut snowflakes, don’t you think? Well, there you have it, a mini Christmas sign to hang. It won’t need anything too strong either, as it’s very light.

Thanks for stopping by, hope you liked today’s project. Let me know in the comments if you have any questions. Have a great day and happy crafting!

Supplies:
Writer in black by Kuretake
Wink of Stella in clear by Kuretake
Calligraphy Metallic in silver by Kuretake
Peppermint Collection by Crate Paper
20 gauge wire
craft sticks

Filed Under: Christmas, home decor, Kuretake ZIG

« Merry Christmas Cards
Vintage Button Card Tag »

Leave a Reply Cancel reply

Your email address will not be published. Required fields are marked *

This site uses Akismet to reduce spam. Learn how your comment data is processed.

About the Designer

Hi, I'm Rebecca. I am a child of God. A loving wife of 29 years. A boy mom. A collector of gadgets, gizmos, and superhero action figures. Making the world more organized one planner at a time. Read More…

  • Facebook
  • Instagram
  • Pinterest
  • Twitter

Looking for Something?

Categories

Copyright

You are welcome to feature or share any article, as long as you use only one image and link back to the specific post. You may NOT edit, crop, remove my watermark, or change my images in any way without written permission.

Republishing posts in their entirety is prohibited. If I somehow produce something that inspires you to create your own, please credit me and link back to my site. Thanks!
  • Blog
  • Home
  • Tutorials
  • About Me
  • Contact Me
  • 3D Projects
  • CGP VIP Group

Join us on Instagram

Some days the bar is high. Some days the bar is si Some days the bar is high.
Some days the bar is simply… still here.

And that’s something.

Meet the Still Here Notepad.
A gentle reset for the days that hurt, when the smallest wins still count.

Because sometimes the most important thing you do all day…
is keep going.

#citygirlplanners #plannerlove #notepad
We’ve got some good ones! #citygirlplanners #pl We’ve got some good ones!

#citygirlplanners #plannercommunity #plannerrefills #plannerstuff
Just waiting on that UAP info to drop. 🤔😏 # Just waiting on that UAP info to drop. 🤔😏

#unicornsfromuranus #citygirlplanners #plannerlife #stationerylove
So, I did a thing. Working on a pain point for Per So, I did a thing. Working on a pain point for Personal size. This is for those of you who think it’s too narrow but don’t want to purchase a new PW binder. Franklin Covey Compact is the next best thing. 

If you have a FFC binder already, we now will have refills for you too! 

#franklincoveycompact #citygirlplanners #personalringplanner #lvmmagenda
Foil lovers... we heard you. Since our foil equi Foil lovers... we heard you. 

Since our foil equipment went down, the messages and emails have not stopped. We know how much you love the look and honestly we love it too.

Replacing commercial foil equipment runs into the tens of thousands of dollars and, like a lot of small businesses right now, that's just not realistic. 

After months of testing with our existing setup, we think we found a way to bring foil back.

It's not mass factory perfect. Occasionally there may be a tiny spot where the foil doesn't pull 100%. Nothing obvious, nothing we wouldn't personally use, and nothing that doesn't meet our standards will ship.

But overall? We think it looks pretty gorgeous.

Before we officially bring foil back…

Would you still want it knowing it's handcrafted and not machine perfect? 

Tell me honestly in the comments. Your feedback will decide this one. 

#foilinserts #foilingtechnique #citygirlplannersinserts #citygirlplanners
Now on to the cutting phase. #citygirlplanners # Now on to the cutting phase. 

#citygirlplanners #stationerylove #plannercommunity #behindthescenes
New notepads in the making. Any guesses? #citygir New notepads in the making. Any guesses?

#citygirlplanners #plannercommunity #plannerlove #citygirlplannersinserts
Nothing ruins a perfectly good month like… bills Nothing ruins a perfectly good month like… bills.

Good news: when everything’s written down, at least the chaos is organized.

Pay it. Check it off. Pretend you’re thriving.

#CityGirlPlanners #AdultingButMakeItCute #BillTracker #PlannerLife #OrganizedChaos
Personal Size planners get a bad rap for one reaso Personal Size planners get a bad rap for one reason…

They’re narrow.

And I get it.
Personal is the perfect middle ground. Bigger than Pocket, fits in your purse, but way more portable than A5.

But the width?
That’s always been the complaint.

Lately I’ve been seeing people try to squeeze Personal Wide into standard Personal binders… and then wonder why the pages stick out.

So instead of making it wider… I went the other direction.

Foldouts.

For 2026, I reworked the layout to give you more planning space without changing the footprint.

Month on one page
Straight into your weekly
Dashboard space (because you know I had to keep that)
And when it’s folded?
Standard Personal Size. Fits your binder like it should.

Now I need your opinion before I finalize this…

What works better in vertical boxes?

Graph (left side)
or
Lines (right side)

Tell me in the comments — Graph or Lines?
Follow Us!

Categories

Archives

Copyright © 2026 · HappyCardFactory Designs