HappyCardFactory Designs

Dream. Create. Inspire.

  • Shop
  • Facebook
  • Pinterest
  • Twitter
  • Instagram
  • Home
  • Our Store
  • Blog
  • Tutorials
  • 3D Projects
    • 3D Crafts
    • 3D Flowers
    • 3D Letters
  • Contact
  • About Me
    • About Me
    • Disclosure
    • Privacy Policy
  • Join Our Group
You are here: Home / DIY / Homemade Wiggle Wobble

Homemade Wiggle Wobble

March 9, 2012 by Rebecca Wagner 14 Comments

So, you want to know how to make your own homemade action wobbles, huh? I think the action wobble name is already taken. I’d love to call them Weeble Wobbles but I think that name is already taken too.  So I guess I will have to go with Wiggles©.  See what I did there?  I have now copyrighted the name.  Hahaha, send me the money!  For those of you who are new, I’m just kidding.  I do that a lot.  Just don’t call the men with straight jackets yet.  Wait till after the goodies. Anyway, here we are again with another amazing, money-saving tutorial – make your own Wiggles.


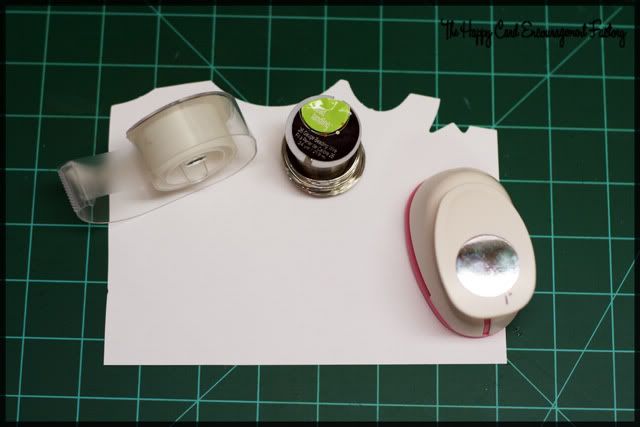
This time you need four products.  I didn’t include scissors or a round stick/barrel because I figured you would use what you have.    All we really have to have is paper (I recommend you use heavier card stock, at least 65 lb), 1″ paper punch, invisible tape and 26 gauge wire.  You can use other gauges but 26 seems to be the sweet spot.  I have 22 and 24, you don’t get as much Wiggle out of them.

Punch out 2 circles.  This is going to be the top and bottom of your Wiggle.

After you have your circles punched out, take something that is about 1″- 1 1/2″ in diameter.  Place one end of your wire flat against it and wrap around twice.

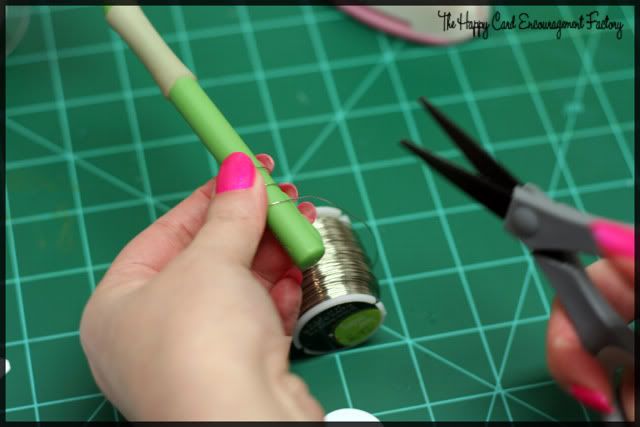
Cut the wire close.  It should look like this.

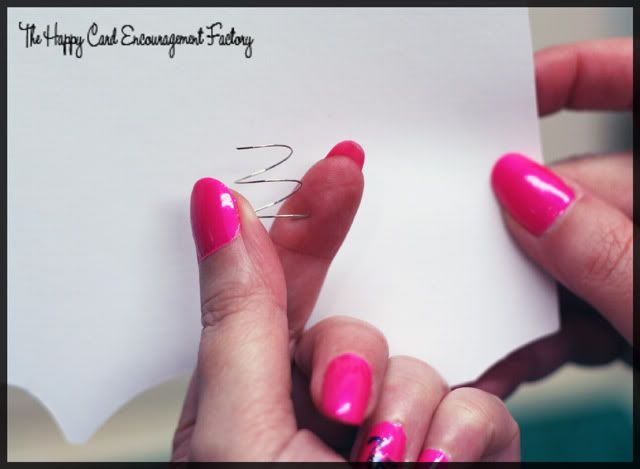
See, it makes a nice little spring form.

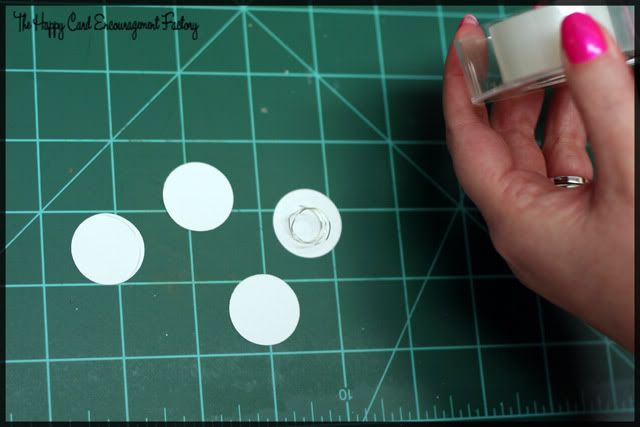
Now take and tape one end of the wire to one circle.  Believe it or not, the tape holds it quite well.  I have never had a problem with the wire coming up.  If you think of better method, use that.  Use whatever it takes to make it work for you.

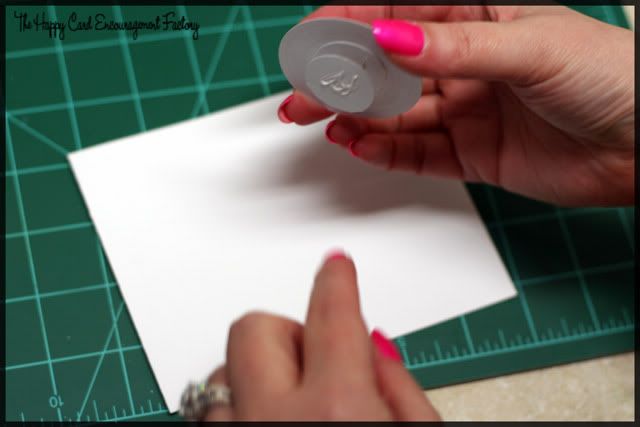
Proceed to tape the other end on your second circle.  Here I have already glued it to the back of my bigger circle that I stamped and getting ready to fasten it to the card.  I guess I didn’t take a picture of that step.  Sorry, I hope it still makes sense.  Once you have the spring glued to both discs, it can be used for any shape.  Check out my sis’s birthday card.

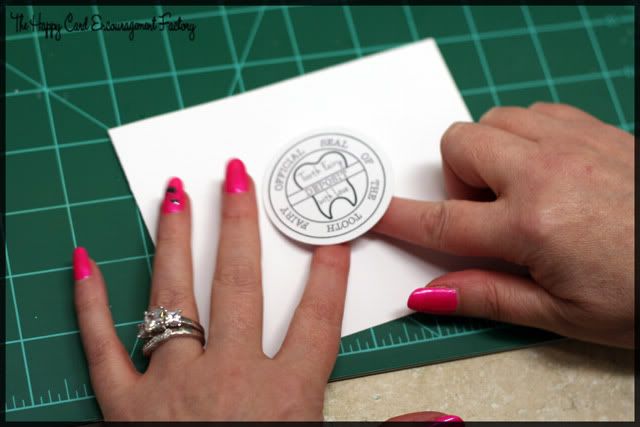
Here it is going onto my example card.  The Tooth Fairy seal of approval stamp from A Jillian Vance Design is about to get jiggy wit it.

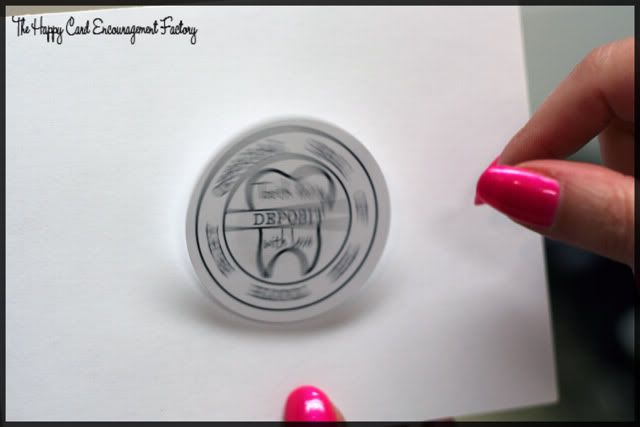
I can hear Will Smith singing now!  Na na na na na na na nana……getting jiggy wit it!  Oooo, maybe Jiggies© would be a better name.  hehehe  Would you like to see it in action?  Check out the video I made below and then get to making your own!

Seeing as Amazon has a pack of 48 wobbles for $13.84 right now, I am pretty sure the homemade ones are cheaper.  For as much as I make action cards, I am definitely saving money using products I already have on hand.  The wire cost me about $1.38 at Michaels with a coupon.  OK, they are not as sleek looking but who is gonna be looking.  What’cha think?  Let me know in the comments. 

Filed Under: DIY, homemade, tutorial, Wiggles

« Tiny in the Spring
Kiss Me Banner »

Comments

  1. Scrappin Dhilly says

    March 9, 2012 at 8:26 pm

    That is pretty cool, I’m loving all of your tutorials, I am still waiting for the hubby to cut my pvc pipe for the daubers! Thanks for the money saving tips! By the way, your nails look beautiful!

    http://www.scrappindhilly.blogspot.com

    Reply
  2. Alyssa Leanne says

    March 9, 2012 at 9:10 pm

    Very cool Becki! I really need to buy some wire, I’ve been meaning to for quite a while now, you just gave me one more reason!

    <3 Alyssa

    Reply
  3. -Candi says

    March 9, 2012 at 9:23 pm

    I think this is awesome! I’ve had those action wobbles in and out of my amazon cart so many times in the past few weeks, and I noticed that after more people found out about them recently the prices have gone up. I love your idea, plus you can make them as small as you need this way. I’m looking forward to trying it out!

    Reply
  4. Becki says

    March 9, 2012 at 10:38 pm

    Thanks, ladies!

    @Scrappin Dhilly, tell your husband to get crackin’! LOL Thanks for the nail compliment! I just painted them yesterday. Sinful Colors in Bikini for the win!

    @Alyssa, buy some stat! I can only imagine what you would make with your own wobblers.

    @Candi, when I went to check the price a couple of days ago I noticed that too. Well now you don’t have to worry about price fluctuation!

    Reply
  5. Flamenco92627/ Julieta says

    March 10, 2012 at 1:21 pm

    Love the tutorial! Thanks for sharing.

    Reply
  6. Bee's hive says

    March 11, 2012 at 4:48 pm

    You totally ROCK! Love this and I never thought of using that tape…really it seems that us crafters get all uppity about supplies but sometimesit’s the cheaper ones that work best!

    Reply
  7. Becki says

    March 11, 2012 at 5:44 pm

    @Julieta, thanks for commenting and stopping by!

    @Bee, thanks! I know there are so many awesome tools for us crafters but the companies must think we all have money or will buy it because it is the next big thing. I will say I do get a quick pang of jealousy when I see another crafty friend buying all the new stuff like a crazy person. Then I realize I am such a cheap person I look for ways to save. Then I get happy and satisfaction. Another way of being crafty!

    Reply
  8. MichelleMyBelle says

    March 12, 2012 at 10:29 pm

    I have wire just sitting in my drawer needing to be used. LOL

    Love the nails!

    Reply
  9. Becki says

    March 12, 2012 at 11:37 pm

    Well, hop to it Michelle! LOL Thanks for the nail compliment. hehehe, I am currently painting them green for St. Paddy’s day and might just add ScrappyDew’s clover to one nail.

    Reply
  10. Debbie H. says

    May 23, 2012 at 5:33 pm

    I LOVE this so much! Thanks for the $$saving tips! Can’t wait to make some, and I love Candi’s idea for making them different sizes! FUN FUN!

    Reply
  11. Nancy S says

    October 15, 2012 at 4:05 pm

    Thanks for sharing, great idea!!

    Reply
  12. Amy Maldonado says

    February 24, 2013 at 5:49 am

    I LOVE you Idea’s! First thing in the morning I am going to the store, purchasing 26” gauge wire and I am going to make some wiggles! Show my friends! You are Awesome!

    Reply
    • Rebecca Wagner says

      May 20, 2013 at 12:14 pm

      Let me know how it works out!

      Reply
  13. Anonymous says

    May 12, 2016 at 5:26 pm

    huh, good tutorial. Especially if you need one n a pinch. By the way you need the trademark symbol ( little TM that’s superscripted. Copyright would be your tutorial, wiggles would need trademark. Unfortunately, unlike copyright which naturally attached trademark requires the paperwork.

    Reply

Leave a Reply Cancel reply

Your email address will not be published. Required fields are marked *

This site uses Akismet to reduce spam. Learn how your comment data is processed.

About the Designer

Hi, I'm Rebecca. I am a child of God. A loving wife of 29 years. A boy mom. A collector of gadgets, gizmos, and superhero action figures. Making the world more organized one planner at a time. Read More…

  • Facebook
  • Instagram
  • Pinterest
  • Twitter

Looking for Something?

Categories

Copyright

You are welcome to feature or share any article, as long as you use only one image and link back to the specific post. You may NOT edit, crop, remove my watermark, or change my images in any way without written permission.

Republishing posts in their entirety is prohibited. If I somehow produce something that inspires you to create your own, please credit me and link back to my site. Thanks!
  • Blog
  • Home
  • Tutorials
  • About Me
  • Contact Me
  • 3D Projects
  • CGP VIP Group

Join us on Instagram

Foil lovers... we heard you. Since our foil equi Foil lovers... we heard you. 

Since our foil equipment went down, the messages and emails have not stopped. We know how much you love the look and honestly we love it too.

Replacing commercial foil equipment runs into the tens of thousands of dollars and, like a lot of small businesses right now, that's just not realistic. 

After months of testing with our existing setup, we think we found a way to bring foil back.

It's not mass factory perfect. Occasionally there may be a tiny spot where the foil doesn't pull 100%. Nothing obvious, nothing we wouldn't personally use, and nothing that doesn't meet our standards will ship.

But overall? We think it looks pretty gorgeous.

Before we officially bring foil back…

Would you still want it knowing it's handcrafted and not machine perfect? 

Tell me honestly in the comments. Your feedback will decide this one. 

#foilinserts #foilingtechnique #citygirlplannersinserts #citygirlplanners
Now on to the cutting phase. #citygirlplanners # Now on to the cutting phase. 

#citygirlplanners #stationerylove #plannercommunity #behindthescenes
New notepads in the making. Any guesses? #citygir New notepads in the making. Any guesses?

#citygirlplanners #plannercommunity #plannerlove #citygirlplannersinserts
Nothing ruins a perfectly good month like… bills Nothing ruins a perfectly good month like… bills.

Good news: when everything’s written down, at least the chaos is organized.

Pay it. Check it off. Pretend you’re thriving.

#CityGirlPlanners #AdultingButMakeItCute #BillTracker #PlannerLife #OrganizedChaos
Personal Size planners get a bad rap for one reaso Personal Size planners get a bad rap for one reason…

They’re narrow.

And I get it.
Personal is the perfect middle ground. Bigger than Pocket, fits in your purse, but way more portable than A5.

But the width?
That’s always been the complaint.

Lately I’ve been seeing people try to squeeze Personal Wide into standard Personal binders… and then wonder why the pages stick out.

So instead of making it wider… I went the other direction.

Foldouts.

For 2026, I reworked the layout to give you more planning space without changing the footprint.

Month on one page
Straight into your weekly
Dashboard space (because you know I had to keep that)
And when it’s folded?
Standard Personal Size. Fits your binder like it should.

Now I need your opinion before I finalize this…

What works better in vertical boxes?

Graph (left side)
or
Lines (right side)

Tell me in the comments — Graph or Lines?
Who else misses Micro planners? I found this under Who else misses Micro planners? I found this under a stack of papers. Don’t know how long it’s been chillin under there but I’m going to start using it. Great for quick notes and things you need to dump but don’t need long term.
Field research, planner style. Since the Coach no Field research, planner style.

Since the Coach notebooks are sold out, I grabbed this leather cover on Amazon to test the fit.
Good news: it fits beautifully (and it’s roomy enough for tabs).

Bad news?
I got excited and didn’t read the whole listing.

No snap.
No elastic.
Just vibes.

Luckily I’ve got elastic on hand… but consider this your reminder from someone who learned the hard way:

Read the full listing, friends.

#plannerlife #plannercommunity #a5planner #plannerfinds #citygirlplanners
Sometimes the best combinations aren’t planned… they just happen.

The Aquarelle Sky cover paired with Candy Rush tabs turned out to be one of those moments. The colors line up so perfectly, it looks like they were made for each other.

Just a little unexpected color magic.
Every tab is placed by hand. Nothing here is auto Every tab is placed by hand.

Nothing here is automated. We print, cut, laminate, punch, and assemble every order ourselves.

When you shop with us, two real humans have touched every single piece.

#smallbusinesslife #madebyhand #behindthescenes #plannercommunity  #shopsmallbusiness
Follow Us!

Categories

Archives

Copyright © 2026 · HappyCardFactory Designs