HappyCardFactory Designs

Dream. Create. Inspire.

  • Shop
  • Facebook
  • Pinterest
  • Twitter
  • Instagram
  • Home
  • Our Store
  • Blog
  • Tutorials
  • 3D Projects
    • 3D Crafts
    • 3D Flowers
    • 3D Letters
  • Contact
  • About Me
    • About Me
    • Disclosure
    • Privacy Policy
  • Join Our Group
You are here: Home / home decor / Kokeshi Doll Shadow Box

Kokeshi Doll Shadow Box

January 28, 2013 by Rebecca Wagner 5 Comments

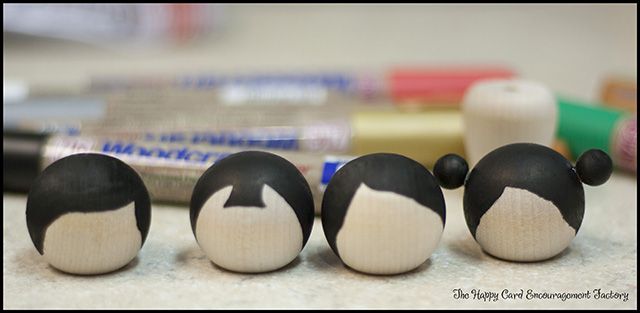
I love Japan and it’s culture. My Aunt and Uncle have lived there as missionaries for the past 18 years, I have not yet been able to visit them. They bring me lots of goodies when they come visit, but I would still love to see it for myself. So when Kuretake said our next theme was Japanese, I was so excited. I just had to come up with an great idea. While searching, I started to see those Kokeshi dolls floating around the internet. Hmm, I have quite a few of the Woodcraft markers. I’m sure I could whip a few of these little beauties and find a way to showcase them.I got the idea for the little dolls from Restless Risa’s Japanese Themed Birthday party. These were perfect for my shadow box. I started with the easiest part – the head. I put the head on the end of a pencil and colored different hairstyles with my black Woodcraft marker. Here is a close-up. It was easier to color the buns before attaching them with glue.

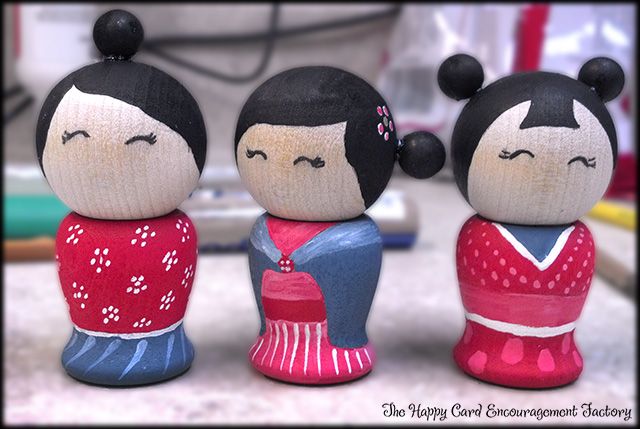
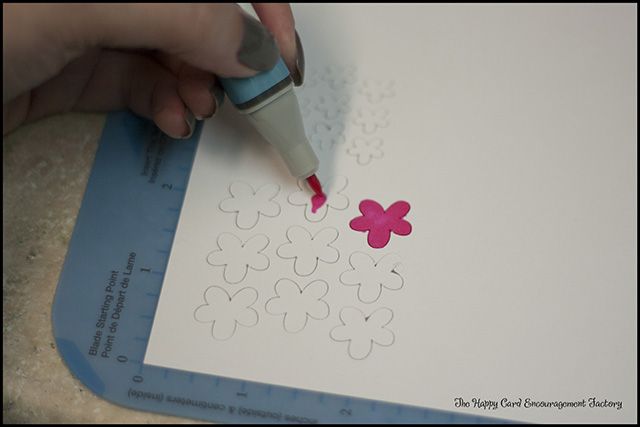
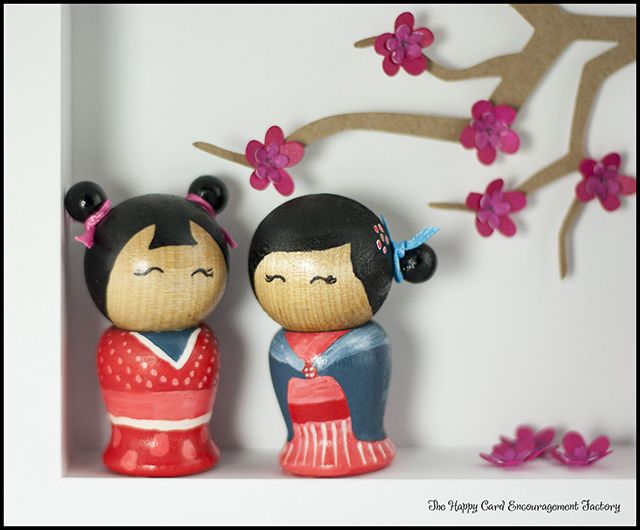
The next step was to color their kimonos. I looked at a few pictures online and just painted in some simple designs. I didn’t have a pink or light blue marker on hand. I found a simple solution. In order to get the paint flowing through the tip you have to pump it on paper a few times. If you do it too much, it will leak out. Which, under normal circumstances, is to be avoided. It worked to my advantage here. I pumped the red and white markers out in little pools onto a piece of scrap paper. I mixed them together till I liked the pink, then using the red marker picked up the color. Don’t worry about ruining your marker. It can be rubbed across paper till it returns to its normal color. It does not absorb far back into the marker. Although, you will use up your marker quicker this way. I would recommend using the darker marker to pick up the color when using this method. You could use the lighter but it seemed to take more rubbing to get all the other color off.
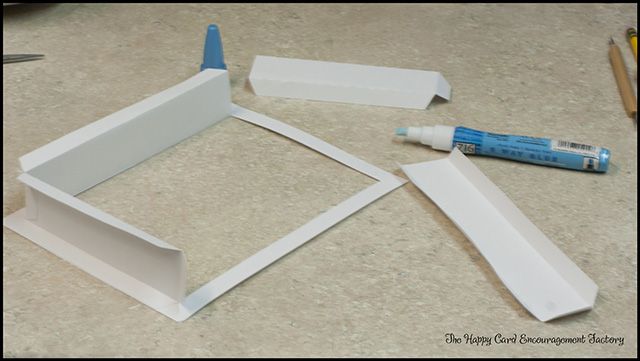
When I was done designing their clothes, they needed a sealer shower. I liked them on the shiner side, so I used the gloss spray. A little ribbon and I could move on to the hanging shadow box. It was a file I cut in my electronic cutting machine. I used my ZIG 2-Way to glue the box together. Worked up really fast.

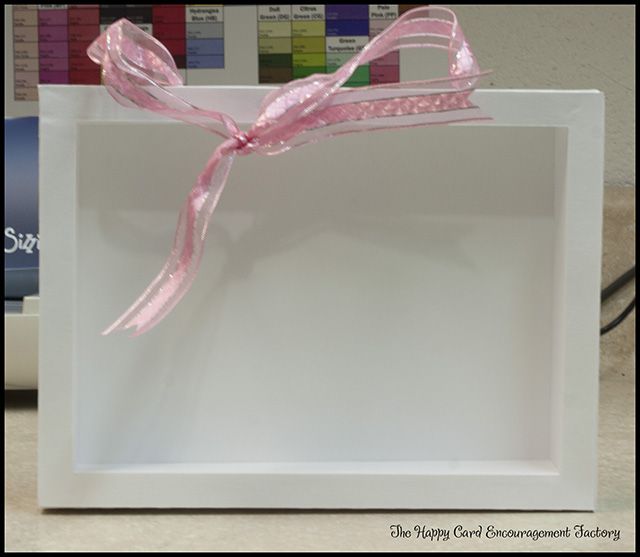
Here it is completed and waiting for my little cuties to go inside.

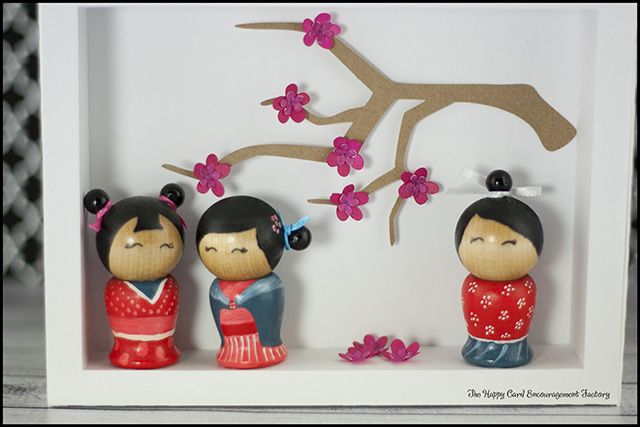
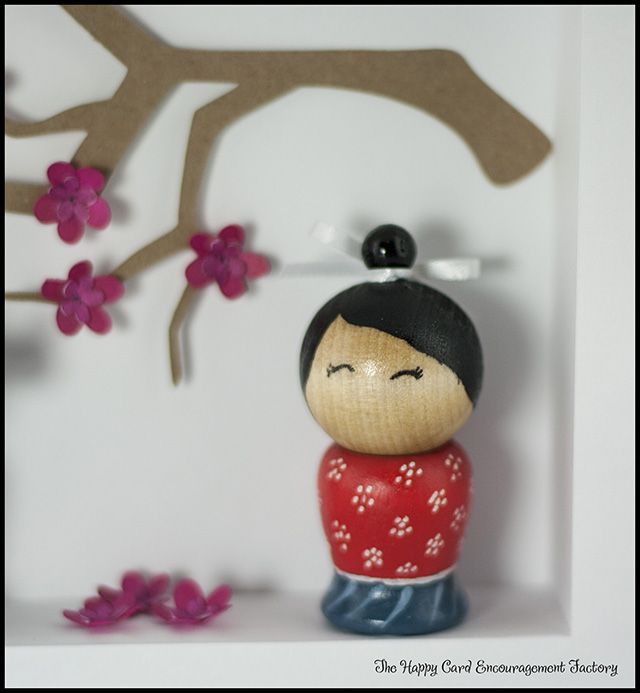
I thought the dolls needed a little scenery. I kept it simple because I wanted the focus to be on the girls. I cut the blossoms out of white card stock and used my Kurecolor Twin in Dark Pink for the larger petals and ZIG Memory System Scroll & Brush in Pure Pink for the small ones. I glued the smaller to the larger and added them to the branches with a few that looked like they fell.
 

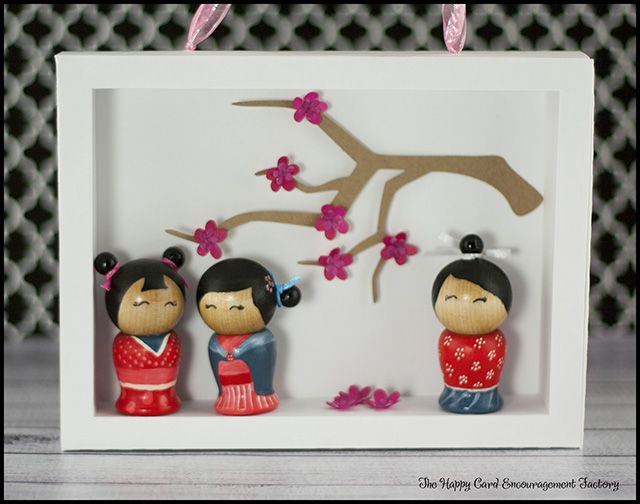
When the individual pieces were done, I was ready to assemble them into their forever home. The one girl is leaning a little. That is my fault. I wanted to twist her a little to the front and damaged the paper a bit. I am just going to pretend she is whispering into her friend’s ear.

I am soo going to hang this in my Asian themed bedroom. It will go perfect. Guess I should get that kimono out that I bought a few years ago and hang it in my room too.


Hope you liked my project today. I had sooo much fun making it. I have been inspired to make a few more of these as they were so simple to put together. Thanks for stopping by and happy crafting!
Supplies:
ZIG Kurecolor Twin in Dark Pink
ZIG Memory System Scroll & Brush in Pure Pink
ZIG Woodcraft Marker Chisel in Crimson, Periwinkle Blue, Arctic White, & Black
ZIG Memory System 2-Way Glue
5×7 shadow box frame by Lori WhitlockKokeshi Dolls – head: Ball Knobs 1 1/4″ with 3/16 hole, buns: 3/8″ round balls, body: 1 1/4″ 5/8″ hole candle cups
E6000 Craft Glue
ribbon

Filed Under: home decor, Japan, Kuretake ZIG, Lori Whitlock, tutorial, WoodCraft

« Coffee Cup Trendy Tags
Happiness Card »

Comments

  1. jessica says

    January 28, 2013 at 4:36 pm

    WOW!!! This is gorgeous!!!!!

    Reply
  2. Jani Lewis says

    January 28, 2013 at 4:47 pm

    These are adorable. Love all the details and flowers.

    Reply
  3. Joanna says

    January 28, 2013 at 5:19 pm

    Wow, you are so clever Becki, this is a beautiful project.

    Reply
  4. Steph @ Crafting in the Rain says

    January 29, 2013 at 4:14 am

    So adorable!! Love all the detail šŸ™‚

    Reply
  5. Beth Jackson Klosterboer says

    January 30, 2013 at 2:39 am

    Such cute dolls and the box looks amazing.

    Reply

Leave a Reply Cancel reply

Your email address will not be published. Required fields are marked *

This site uses Akismet to reduce spam. Learn how your comment data is processed.

About the Designer

Hi, I'm Rebecca. I am a child of God. A loving wife of 29 years. A boy mom. A collector of gadgets, gizmos, and superhero action figures. Making the world more organized one planner at a time. Read More…

  • Facebook
  • Instagram
  • Pinterest
  • Twitter

Looking for Something?

Categories

Copyright

You are welcome to feature or share any article, as long as you use only one image and link back to the specific post. You may NOT edit, crop, remove my watermark, or change my images in any way without written permission.

Republishing posts in their entirety is prohibited. If I somehow produce something that inspires you to create your own, please credit me and link back to my site. Thanks!
  • Blog
  • Home
  • Tutorials
  • About Me
  • Contact Me
  • 3D Projects
  • CGP VIP Group

Join us on Instagram

We’ve got some good ones! #citygirlplanners #pl We’ve got some good ones!

#citygirlplanners #plannercommunity #plannerrefills #plannerstuff
Just waiting on that UAP info to drop. šŸ¤”šŸ˜ # Just waiting on that UAP info to drop. šŸ¤”šŸ˜

#unicornsfromuranus #citygirlplanners #plannerlife #stationerylove
So, I did a thing. Working on a pain point for Per So, I did a thing. Working on a pain point for Personal size. This is for those of you who think it’s too narrow but don’t want to purchase a new PW binder. Franklin Covey Compact is the next best thing. 

If you have a FFC binder already, we now will have refills for you too! 

#franklincoveycompact #citygirlplanners #personalringplanner #lvmmagenda
Foil lovers... we heard you. Since our foil equi Foil lovers... we heard you. 

Since our foil equipment went down, the messages and emails have not stopped. We know how much you love the look and honestly we love it too.

Replacing commercial foil equipment runs into the tens of thousands of dollars and, like a lot of small businesses right now, that's just not realistic. 

After months of testing with our existing setup, we think we found a way to bring foil back.

It's not mass factory perfect. Occasionally there may be a tiny spot where the foil doesn't pull 100%. Nothing obvious, nothing we wouldn't personally use, and nothing that doesn't meet our standards will ship.

But overall? We think it looks pretty gorgeous.

Before we officially bring foil back…

Would you still want it knowing it's handcrafted and not machine perfect? 

Tell me honestly in the comments. Your feedback will decide this one. 

#foilinserts #foilingtechnique #citygirlplannersinserts #citygirlplanners
Now on to the cutting phase. #citygirlplanners # Now on to the cutting phase. 

#citygirlplanners #stationerylove #plannercommunity #behindthescenes
New notepads in the making. Any guesses? #citygir New notepads in the making. Any guesses?

#citygirlplanners #plannercommunity #plannerlove #citygirlplannersinserts
Nothing ruins a perfectly good month like… bills Nothing ruins a perfectly good month like… bills.

Good news: when everything’s written down, at least the chaos is organized.

Pay it. Check it off. Pretend you’re thriving.

#CityGirlPlanners #AdultingButMakeItCute #BillTracker #PlannerLife #OrganizedChaos
Personal Size planners get a bad rap for one reaso Personal Size planners get a bad rap for one reason…

They’re narrow.

And I get it.
Personal is the perfect middle ground. Bigger than Pocket, fits in your purse, but way more portable than A5.

But the width?
That’s always been the complaint.

Lately I’ve been seeing people try to squeeze Personal Wide into standard Personal binders… and then wonder why the pages stick out.

So instead of making it wider… I went the other direction.

Foldouts.

For 2026, I reworked the layout to give you more planning space without changing the footprint.

Month on one page
Straight into your weekly
Dashboard space (because you know I had to keep that)
And when it’s folded?
Standard Personal Size. Fits your binder like it should.

Now I need your opinion before I finalize this…

What works better in vertical boxes?

Graph (left side)
or
Lines (right side)

Tell me in the comments — Graph or Lines?
Who else misses Micro planners? I found this under Who else misses Micro planners? I found this under a stack of papers. Don’t know how long it’s been chillin under there but I’m going to start using it. Great for quick notes and things you need to dump but don’t need long term.
Follow Us!

Categories

Archives

Copyright © 2026 · HappyCardFactory Designs