HappyCardFactory Designs

Dream. Create. Inspire.

  • Shop
  • Facebook
  • Pinterest
  • Twitter
  • Instagram
  • Home
  • Our Store
  • Blog
  • Tutorials
  • 3D Projects
    • 3D Crafts
    • 3D Flowers
    • 3D Letters
  • Contact
  • About Me
    • About Me
    • Disclosure
    • Privacy Policy
  • Join Our Group
You are here: Home / home decor / Tulle Christmas Trees, What Not to Do

Tulle Christmas Trees, What Not to Do

December 29, 2011 by Rebecca Wagner 18 Comments

Tulle trees, nylon net trees, sheesh, it’s all the same to me I guess!  All I wanted was to make tulle Christmas trees like my grandmother did in the old days. When we were looking for table decoration ideas for the Ladies Christmas Banquet at church, we could not find instructions anywhere.  Maybe because I don’t know the difference between tulle and nylon net.  Google is not all knowing, just for the record. You’d think in today’s day and age a search engine could read my mind.  hrumph..Anyway, after weeks of searching we finally found one.  (Note to self, start using Bing or use the right keywords!)

Upon reading the instructions, I couldn’t figure out (still at this point not understanding there is a difference) where they bought 72″ wide tulle.  All I could find was 6″ wide.  There is a really big length disparity there!  But we plugged away using the (all ready purchased) 6″ roll.  Frustration starts here…why, oh, why I make things harder for myself, I don’t know.  And poor Kathy and Sarah decided to help me.  “We can help you” is probably something they will never say to me again.

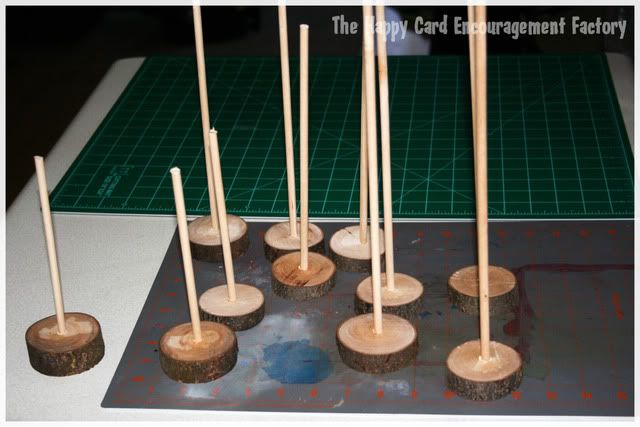
I can’t even begin to tell you how we adjusted the pattern.  I think I have blocked it from my mind entirely.  It went something like we made the lengths what was called for in the width and our widths the lengths. Clear as mud?  Example, it calls for a piece 15″ long x 72″ wide first, folded in half, making it 7 1/2″ by 72″.  Then you run a basting stitch close to the fold about 1/4″ in.  We made our tulle 72″ long and didn’t fold it.  We left it 6″ (remember that was the width of the roll?) by 72″ then ran a basting stitch 1/4″ in.  Confused yet, yeah.  Trust me, just stick to the pattern, you will be happy and saner for it in the long run.  We started third row down since our tallest tree was 12″ high instead of 18″, it worked out good with that being the base.  Speaking of the base, my husband cut some hickory logs and we glued four 12″, four 9″ and then four 6″ dowels.  That gave use three size trees for each table.

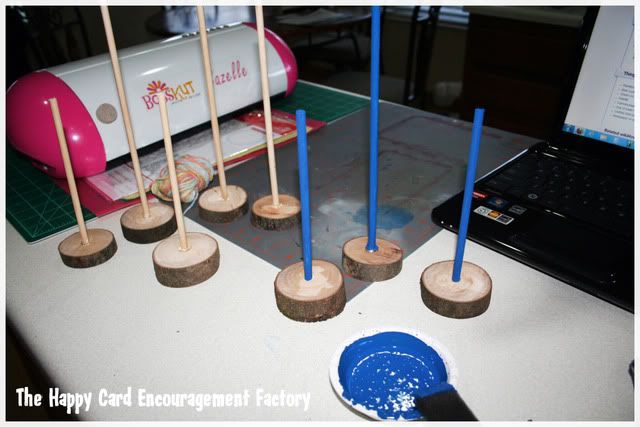
Hindsight is 20/20 right?  I should have used a lighter color paint for the dowels.  I just wanted them to kind of fade into the tree.  This color was a little more obvious.

Again, do yourself a favor and follow the pattern.  Don’t do it my dum-dum way.  I even got desperate and went searching for a different pattern that used the 6″ roll or an easier way than sewing.  I haven’t used my sewing machine in years.  Very, very rusty I was.  None to be found.  Trust me, this is not meant to be a tutorial.  One, I stink at tuts and two, I really can’t bear to re-visit this horror.

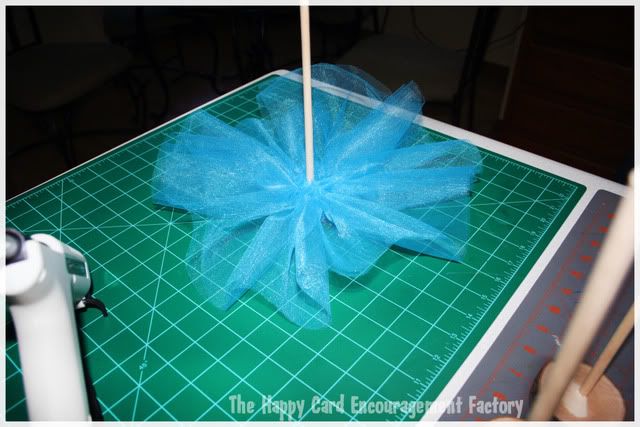
Just keep sewing the net according to the directions and in about two weeks you MIGHT have a completed tree.  Our 12″ tree had about 10 rings starting at the 12″ by 72″ line in the pattern.  Now it was time to get to the easy part, decorating.  I found a bag of wood snowflakes at Hobby Lobby.  Painting is something I can do and it was a relief to get to that part of the project.  It meant we were also done.  That ol’ hindsight again, I should have bought snowflakes in three different sizes as the large were a little too overpowering on the small trees.  I wanted this over and done with pronto and wasn’t about to scrap those and hunt down more.  We did sprinkle the snowflakes with glitter to add a little sparkle.

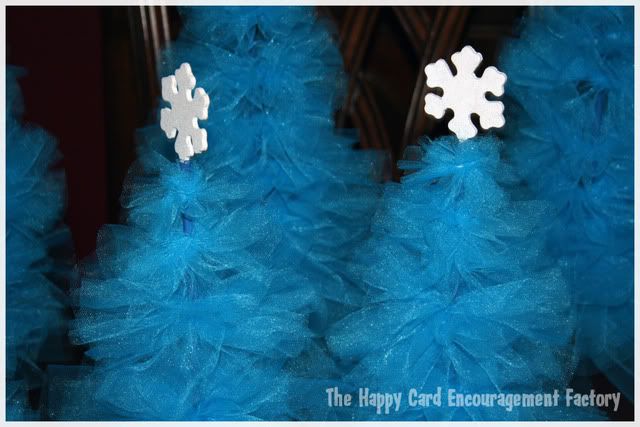
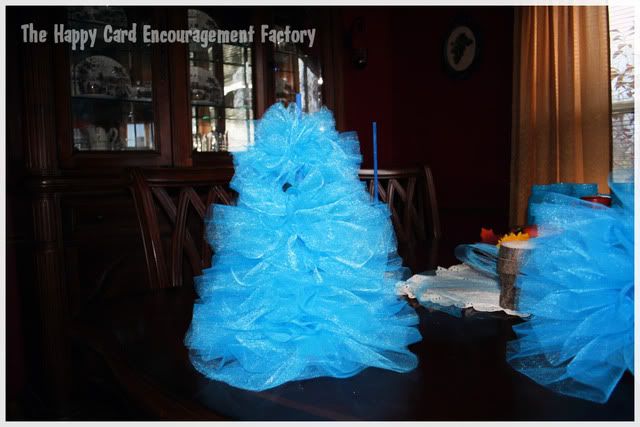
Here is a picture of them almost done.  They are all naked and hanging out waiting on the ornaments.  Which we hadn’t purchased at this point.  I found mini glitter balls in various sizes and hot glued all over the trees.

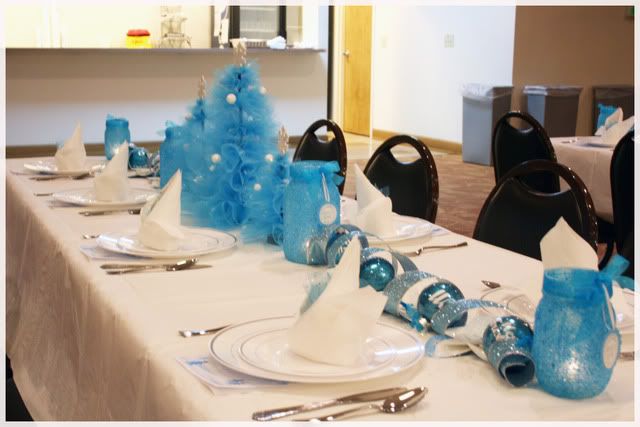
This is a what NOT to do in making tulle..umm..I mean…nylon net trees.  For all the trouble they were, it was worth it.  The tables were simple and beautiful.  You can see the luminaries from Mason jars and Epsom salt, also the glitter ornaments (minus the clothes) on the tables too.  I used white vinyl to put Merry Christmas on one side and 2011 on the other.   I made enough for everyone to take an ornament home.  It was my gift to the ladies for coming.

Hope I didn’t confuse you guys too much and you enjoyed hearing about my misery.   At least you know you are not alone when you have a really bad crafting day.  It all works out in the end, doesn’t it.  LOL  Have a great day crafting!

Filed Under: Christmas, crafts, Hobby Lobby, home decor

« Best Friends Bag
Patchwork Poinsettia Card »

Comments

  1. MichelleMyBelle says

    January 1, 2012 at 2:08 am

    Becki, the tables are so beautiful! It was all worth the frustration.

    Reply
  2. Yvonne says

    January 2, 2012 at 3:33 am

    I love these little trees! Pinning this for next year. ~Yvonne OneCreativeMomma.blogspot.com

    Reply
  3. Becki says

    January 2, 2012 at 8:49 pm

    Thanks ladies! The tables looked really good and it was worth all the frustration. ^__^

    Thanks for pinning, Yvonne! You will have to show me when you finish them next year.

    Reply
  4. Heather G. says

    October 4, 2012 at 4:52 pm

    You can buy tulle in a fabric store that wide!! ANY fabric store!

    Reply
  5. Rebecca Wagner says

    October 30, 2012 at 11:39 pm

    Thanks, Heather. I found that out after the fact. LOL

    Reply
  6. jojo says

    December 11, 2012 at 4:46 am

    I absolutely love your instructions and believe it or not, yours made more sense than all the others I have read. Thank you. I will try this tomorrow and hope I can turn out trees half as nice as yours.

    Reply
  7. jojo says

    December 11, 2012 at 4:47 am

    I still don’t understand the sewing part and I am great with a sewing needle.

    Reply
    • Rebecca Wagner says

      December 13, 2012 at 5:47 pm

      What exactly are you having trouble with? I can see if I can help. ^__^

      Reply
  8. jojo says

    December 22, 2012 at 4:36 am

    Very lovely. I used Styrofoam cones, all different heights and the tulle and netting adhered so well, though I did give a quick spray of tacky glue.

    Reply
  9. jojo says

    December 22, 2012 at 4:37 am

    Thanks Rebecca for the offer but I think I figured it out. I’m loving these trees and it makes such a lovely gift.

    Reply
    • Rebecca Wagner says

      May 20, 2013 at 12:12 pm

      Glad you got it all worked out! Make sure you post some pictures of your finished product to my Facebook page. I would love to see them.

      Reply
  10. Jackie says

    December 1, 2013 at 3:40 pm

    Many years ago I made this tree using a 12 or 15 inch taper candle in a candle holder. I cut 72 inch netting in sizes from 8″, 7″, 6″ and then 1/2″ gradually down to 1/2″ and then I took the strips and gathered them with needle and color thread and fitted each one around the candle. I do not know if these are the exact measurements because I did not save the pattern so I am guessing but obviously it starts large and goes to small at the top for a Christmas tree. I use dark green w/ green candle and also white w/white candle. They are sooooo pretty. Time consuming, yes. If anyone knows the exact measurements, I would appreciate. Thanks

    Reply
    • Becki says

      December 1, 2013 at 5:50 pm

      Jackie, thanks for stopping by and commenting. Did you check the link that says pattern? It has some measurements for tulle that is 72″. Could those be similar to the ones you made before?

      Reply
  11. mimi leland says

    December 2, 2013 at 2:28 am

    Hello,
    These are beautiful! I am trying to figure out how we made ours in 1972 in Home Economics class. We used a candle and rubber bands. They were beautiful. No glue or sewing. Any idea how this would be done? Thanks Mimi

    Reply
    • Becki says

      December 3, 2013 at 8:08 am

      Hi Mimi, thanks for stopping by. Without glue or sewing, I would think you would take the tulle and fold it in half. Then put the rubber band between the fold, around the candle. Does that make sense? Now that you mention it, I think I remember my grandmother making these like that. Would be much quicker than the way I made them. LOL

      Reply
  12. jessica says

    October 5, 2014 at 3:33 pm

    I could not find 72 inch tulle but they do make a very wide tulle

    http://www.giftsintl-us.com/products.php?cat=58

    and the 6 inch here is very, very cheap compared to craft stores.

    http://www.giftsintl-us.com/products.php?cat=83

    Reply
  13. Becki says

    October 6, 2014 at 10:09 am

    Thanks, Jessica!

    Reply
  14. Carl says

    November 12, 2016 at 11:40 am

    I’m 65 years old and my Aunt Louise helprd all 6 kids make these every year in grade school for our teachers. Better than rose shaped soaps. LOL. The thing we did different was gather the tule strips in the center and use a small rubber band around then flatten the two layers and slide the hole onto the dowel and arrange for layer of branches. Easier than sewing.

    Reply

Leave a Reply Cancel reply

Your email address will not be published. Required fields are marked *

This site uses Akismet to reduce spam. Learn how your comment data is processed.

About the Designer

Hi, I'm Rebecca. I am a child of God. A loving wife of 29 years. A boy mom. A collector of gadgets, gizmos, and superhero action figures. Making the world more organized one planner at a time. Read More…

  • Facebook
  • Instagram
  • Pinterest
  • Twitter

Looking for Something?

Categories

Copyright

You are welcome to feature or share any article, as long as you use only one image and link back to the specific post. You may NOT edit, crop, remove my watermark, or change my images in any way without written permission.

Republishing posts in their entirety is prohibited. If I somehow produce something that inspires you to create your own, please credit me and link back to my site. Thanks!
  • Blog
  • Home
  • Tutorials
  • About Me
  • Contact Me
  • 3D Projects
  • CGP VIP Group

Join us on Instagram

When your equipment warns you that it will bite if When your equipment warns you that it will bite if you get too close, take heed. Especially when you don’t have any bandaids. It will take the entire pad of your finger off. 🤣🤦🏻‍♀️

#safetyfirst #maximumoverdrive #ghostinthemachine #terminators #machinestryingtokillus #citygirlplanners
“I might be planning your day….or plotting you “I might be planning your day….or plotting your demise. You’ll never know.” – Selina

#OfficeCat #CatsofInstagram #CatBoss #PlannerCommunity #DeskCat #BlackCatMagic #PlanningInStyle #OrganizedLife #StationeryLover #Catitude #BossCat #WorkspaceGoals #PlannerHumor #PurrfectPlanner #CatAndPlanner #citygirlplanners
One of our OGs—still going strong. 🐾

These “My Pet is Home Alone” cards have been riding with us since the very beginning—we’re talking day-one, kitchen-table-startup vibes. And guess what? They’re still one of our top sellers over a decade later. Because protecting your fur (or feather or scale) babies never goes out of style.
💛

#PlannerEssentials #PetEmergencyCard #CityGirlPlanners #Since2014 #PetParentsUnite #StillGoingStrong #SmallBizOG #PetLoversPlanner #StationeryWithPurpose
✨Bookworms, unite!✨ Our redesigned Book Review ✨Bookworms, unite!✨ Our redesigned Book Review insert is here—and she’s prettier than a library on wheels. Keep track of every plot twist, favorite quote, and fictional crush with a layout that actually makes sense (and looks cute doing it).

#bookreviewinsert #readingjournal #discplanner #plannerinspo #stationerylove #booknerd #currentlyreading #plannerpeace #citygirlplanners
🎇 July dashboard locked and loaded. Red and blu 🎇 July dashboard locked and loaded.
Red and blue glitter pen, naturally, because this month’s got fireworks, deadlines, and apparently…roller skates.
This is my bound planner living its best life in full-on hustle mode.

Tabs: hot pink and helpful.
Goals: somewhere between insert idea here and “stop starting fights.”
Mood: handled (barely).

#julyplanner #boundplanner #plannerdashboard #glitterpenpower #stationerycrush #plannerlayout #citygirlplanners #plannergirlvibes #desksetupgoals #plannerinspo #organizedchaos #getstuffdone
✨Calling all desk divas and binder bosses… Ou ✨Calling all desk divas and binder bosses…

Our Girl Boss planner dividers in Personal size just clocked in.

💼 Teal bags, pink vibes, and a whole stack of “watch me do it anyway.”

No foil, no fluff: just high-glam hustle for your 6-ring slaybook.

Binder shown: Moterm (she’s just here for the photo shoot).

#girlbossplanner #plannerdividers #personalplanner #plannerinsertstyle #plannerglam #plannerinspo #bossbabevibes #tealobsessed #stationerycrush #discobindingnotincluded #citygirlplanners #planninginstyle
Plot twist: You’re not disorganized, you’re ju Plot twist: You’re not disorganized, you’re just trying to do 47 things without writing any of them down.

Grab a planner insert. Save a meltdown.

#CityGirlPlanners #PlannerLife #ProductivityWithAttitude #OrganizeYourChaos #FoiledPlannerInsert #JulySpread #GoldFoilPlanner #PlanWithStyle #PaperObsession #StylishPlanning #WriteItDown
I’ve ignored it. Denied it. Pretended it was ‘ I’ve ignored it. Denied it. Pretended it was ‘not that bad.’ But guess what? It is that bad. New insert drop from the Snark Pack™: Can’t Ignore This Again. Because if I’m gonna spiral, I might as well document it in style.
🌀📓

 #SnarkPack #PlannerInsert #RealTalkRefills #CityGirlPlanners #HotMessExpress #StationeryWithAnAttitude #stationerylove #plannerhumor
Just over here writing rainbow-colored lies into m Just over here writing rainbow-colored lies into my planner so I can feel accomplished.

The Obsessive List Maker insert isn’t judging. She’s enabling. What’s one thing you’re putting on your list just to cross it off?

#citygirlplannersinserts #plannervibes #rainbowstationery #fridayplanning #plannerhumor #colorcodedchaos #paperandplans #citygirlplanners #filofaxmalden
Follow Us!

Categories

Archives

Copyright © 2025 · HappyCardFactory Designs