HappyCardFactory Designs

Dream. Create. Inspire.

  • Shop
  • Facebook
  • Pinterest
  • Twitter
  • Instagram
  • Home
  • Our Store
  • Blog
  • Tutorials
  • 3D Projects
    • 3D Crafts
    • 3D Flowers
    • 3D Letters
  • Contact
  • About Me
    • About Me
    • Disclosure
    • Privacy Policy
  • Join Our Group
You are here: Home / cards / Quick and Easy Cards – Chevron Hi

Quick and Easy Cards – Chevron Hi

March 14, 2014 by Rebecca Wagner 4 Comments

Hi Card MSC 4

Whew! This has been a horrible winter. Yes, I know, tell you guys something you don’t already know. It has kept me from hanging out in my craft room and creating because I have been sick for almost all of February and March. It stinks! I was feeling a little better and my voice had returned, so I thought I would whip up a few cards.

I loved this card pattern from the moment I saw it in the My Scrap Chick newsletter about a month ago. I just couldn’t figure out what color scheme. I do like the grey that’s pictured, but couldn’t decide which color I was going to do. Why not make this quick and easy chevron Hi card in a few colors then. Amiright?Hi Card MSC 8

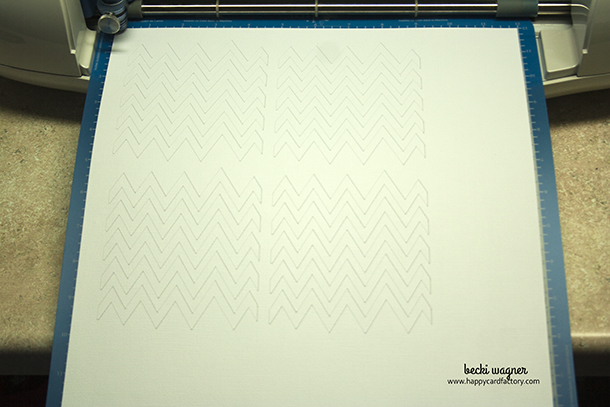
But I still wasn’t feeling too hot and didn’t have the strength to stay out of bed for long. What I had in mind, the amount of colored papers I had to pick out would take forever. And let’s face it, I sometimes like to take the easiest way in my card making. All four took me a little over a half an hour to cut, color, and assemble. Here is a little tutorial on how I managed in that short amount of time. 

I created all four with only three pieces of 12×12 white paper and a scrap of shiny black. Yes I am bragging. That’s a feat for me when I use my die cutter. Way better than all the scraps I would have made cutting one chevron out of a different color to achieve the cute gradient look this pattern is supposed to have. The first piece of paper I used to cut the chevrons and a set of base layers for the sentiment banners.
Hi Card MSC 7

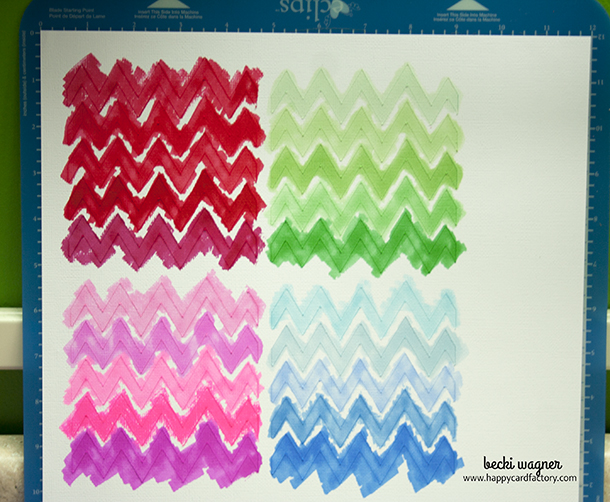
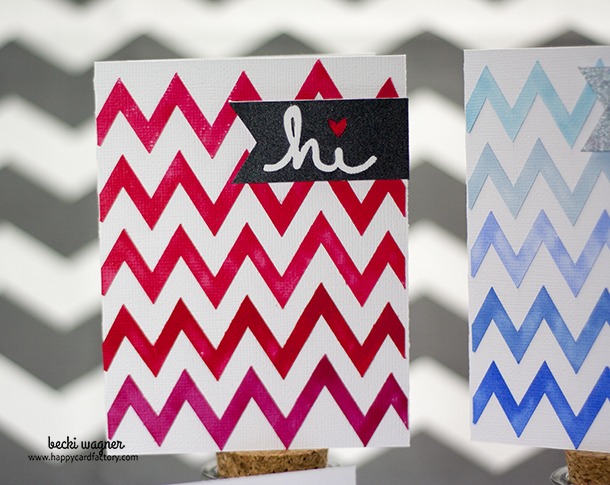
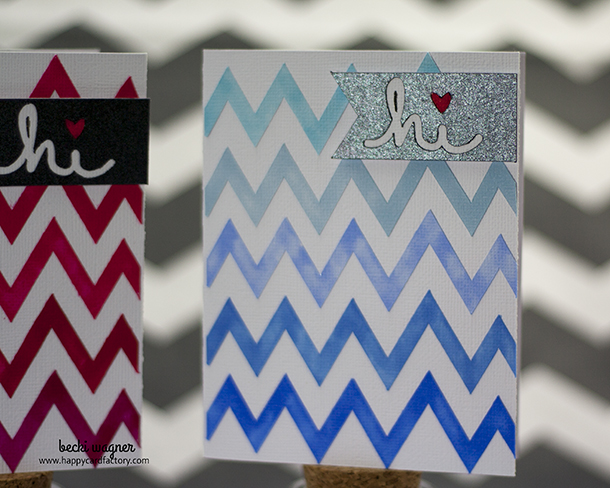
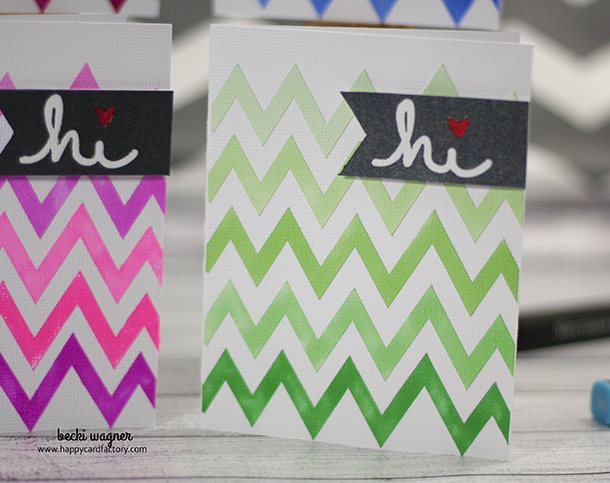
Once I had the chevrons cut, I grabbed four different color sets of my Spectrum Noirs. I quickly colored the cuts, no caring if I got them completely or not. That gave them a slight watercolor effect. It is more pronounced on the blue. The texture of the American Crafts paper contributed to this, I think. Not much of a gradient effect with the red I’m sad to say. I probably should have chosen that color group a little more carefully, but I was just happy to be vertical and crafting again.
Hi Card MSC 6

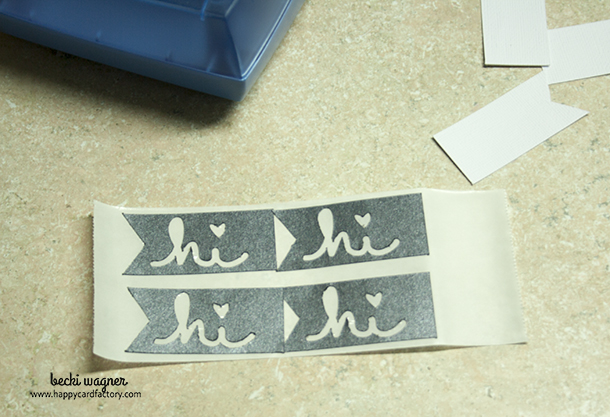
I shaved a bunch of time off with the “hi” cut by layering all three together and making them one cut. Then gluing them to the white base banners I made with the scrap paper from  the chevron cut. Then I just colored in the heart red and made a mark in the “h” to give it the loop. 

Hi Card MSC 5

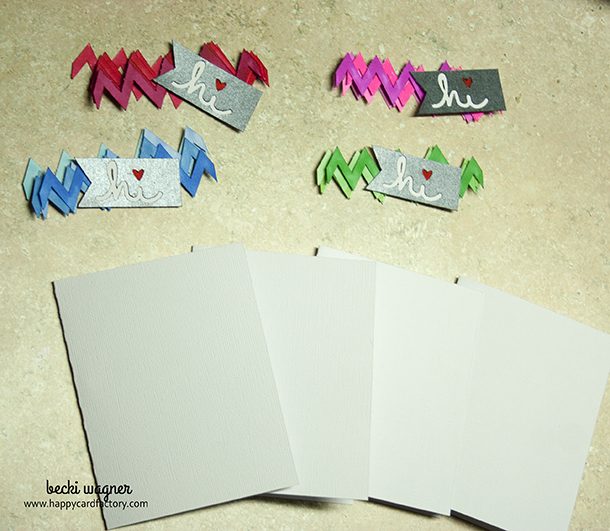
For the last two pieces of white, I cut the four card bases out. I am ready to assemble! To make the placement of the chevrons super quick, I ran them through my Xyron 2.5 in Sticker Maker. It can fit three chevron at a time. Peel and stick, then pop up the sentiment. Four adorable cards on the easy peasy!Hi Card MSCHi Card MSC 1 Hi Card MSC 2 Hi Card MSC 3
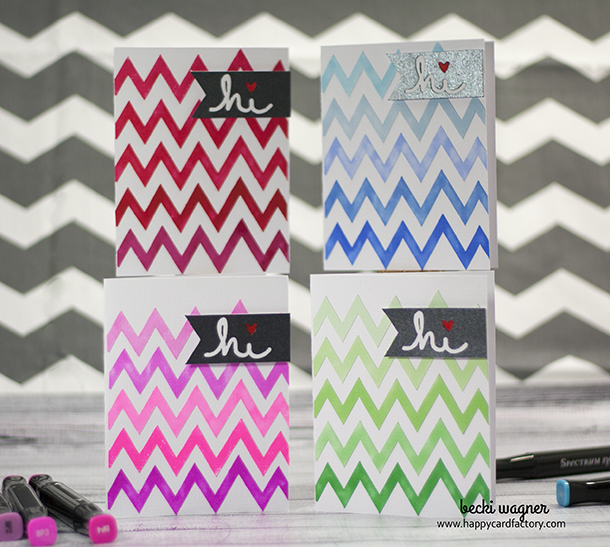
I love that I didn’t have to mess with lots of different cuts and paper and still came out with four cards I know my friends will love. In this day and age, our time is precious. So I am always on the lookout for a quick way to make something that will bring a smile to someone’s face. Because I know if it’s easy, I am more apt to push myself to create. That makes me sound bad, but it’s the truth. šŸ™‚ I’m just glad I can use someone’s creativity and purchase files like this. Otherwise, I would be in no crafty-craft land if it was up to me. Ha!

Supplies used: Hi card by My Scrap Chick; Spectrum Noir markers; Xyron 2.5 in Sticker Maker; American Crafts cardstock in white


Filed Under: cards, My Scrap Chick, Sizzix eclips, Spectrum Noir, tutorial, Xyron

« April Showers Watering Can Gift Bag
3D Pot of Gold Treat Bag »

Comments

  1. krafting kelly says

    March 22, 2014 at 10:07 am

    These are lovely! Great idea to use the Spectrum Noir markers for the gradient effect. Thanks for the inspiration!

    Reply
    • Becki says

      March 22, 2014 at 10:31 am

      You’re welcome, Kelly. Thanks for stopping by!

      Reply
  2. Helen Gullett says

    June 9, 2014 at 1:18 pm

    This is so cool! I am thinking to do with watercolor papers šŸ˜€ THANKS FOR THE INSPIRATION!! oh… have to pin it! LOL!

    Reply
    • Becki says

      June 11, 2014 at 12:18 pm

      Thanks, Helen! Glad you stopped by. šŸ™‚

      Reply

Leave a Reply Cancel reply

Your email address will not be published. Required fields are marked *

This site uses Akismet to reduce spam. Learn how your comment data is processed.

About the Designer

Hi, I'm Rebecca. I am a child of God. A loving wife of 29 years. A boy mom. A collector of gadgets, gizmos, and superhero action figures. Making the world more organized one planner at a time. Read More…

  • Facebook
  • Instagram
  • Pinterest
  • Twitter

Looking for Something?

Categories

Copyright

You are welcome to feature or share any article, as long as you use only one image and link back to the specific post. You may NOT edit, crop, remove my watermark, or change my images in any way without written permission.

Republishing posts in their entirety is prohibited. If I somehow produce something that inspires you to create your own, please credit me and link back to my site. Thanks!
  • Blog
  • Home
  • Tutorials
  • About Me
  • Contact Me
  • 3D Projects
  • CGP VIP Group

Join us on Instagram

Some days the bar is high. Some days the bar is si Some days the bar is high.
Some days the bar is simply… still here.

And that’s something.

Meet the Still Here Notepad.
A gentle reset for the days that hurt, when the smallest wins still count.

Because sometimes the most important thing you do all day…
is keep going.

#citygirlplanners #plannerlove #notepad
We’ve got some good ones! #citygirlplanners #pl We’ve got some good ones!

#citygirlplanners #plannercommunity #plannerrefills #plannerstuff
Just waiting on that UAP info to drop. šŸ¤”šŸ˜ # Just waiting on that UAP info to drop. šŸ¤”šŸ˜

#unicornsfromuranus #citygirlplanners #plannerlife #stationerylove
So, I did a thing. Working on a pain point for Per So, I did a thing. Working on a pain point for Personal size. This is for those of you who think it’s too narrow but don’t want to purchase a new PW binder. Franklin Covey Compact is the next best thing. 

If you have a FFC binder already, we now will have refills for you too! 

#franklincoveycompact #citygirlplanners #personalringplanner #lvmmagenda
Foil lovers... we heard you. Since our foil equi Foil lovers... we heard you. 

Since our foil equipment went down, the messages and emails have not stopped. We know how much you love the look and honestly we love it too.

Replacing commercial foil equipment runs into the tens of thousands of dollars and, like a lot of small businesses right now, that's just not realistic. 

After months of testing with our existing setup, we think we found a way to bring foil back.

It's not mass factory perfect. Occasionally there may be a tiny spot where the foil doesn't pull 100%. Nothing obvious, nothing we wouldn't personally use, and nothing that doesn't meet our standards will ship.

But overall? We think it looks pretty gorgeous.

Before we officially bring foil back…

Would you still want it knowing it's handcrafted and not machine perfect? 

Tell me honestly in the comments. Your feedback will decide this one. 

#foilinserts #foilingtechnique #citygirlplannersinserts #citygirlplanners
Now on to the cutting phase. #citygirlplanners # Now on to the cutting phase. 

#citygirlplanners #stationerylove #plannercommunity #behindthescenes
New notepads in the making. Any guesses? #citygir New notepads in the making. Any guesses?

#citygirlplanners #plannercommunity #plannerlove #citygirlplannersinserts
Nothing ruins a perfectly good month like… bills Nothing ruins a perfectly good month like… bills.

Good news: when everything’s written down, at least the chaos is organized.

Pay it. Check it off. Pretend you’re thriving.

#CityGirlPlanners #AdultingButMakeItCute #BillTracker #PlannerLife #OrganizedChaos
Personal Size planners get a bad rap for one reaso Personal Size planners get a bad rap for one reason…

They’re narrow.

And I get it.
Personal is the perfect middle ground. Bigger than Pocket, fits in your purse, but way more portable than A5.

But the width?
That’s always been the complaint.

Lately I’ve been seeing people try to squeeze Personal Wide into standard Personal binders… and then wonder why the pages stick out.

So instead of making it wider… I went the other direction.

Foldouts.

For 2026, I reworked the layout to give you more planning space without changing the footprint.

Month on one page
Straight into your weekly
Dashboard space (because you know I had to keep that)
And when it’s folded?
Standard Personal Size. Fits your binder like it should.

Now I need your opinion before I finalize this…

What works better in vertical boxes?

Graph (left side)
or
Lines (right side)

Tell me in the comments — Graph or Lines?
Follow Us!

Categories

Archives

Copyright © 2026 · HappyCardFactory Designs