HappyCardFactory Designs

Dream. Create. Inspire.

  • Shop
  • Facebook
  • Pinterest
  • Twitter
  • Instagram
  • Home
  • Our Store
  • Blog
  • Tutorials
  • 3D Projects
    • 3D Crafts
    • 3D Flowers
    • 3D Letters
  • Contact
  • About Me
    • About Me
    • Disclosure
    • Privacy Policy
  • Join Our Group
You are here: Home / Halloween / Here’s Your Sign

Here’s Your Sign

October 24, 2012 by Rebecca Wagner 15 Comments

A very spooky Halloween sign to be exact!  Hi, I’m back with scary uses of twine for this heart-pounding holiday.  OK, my ghosts aren’t that scary but I do think it was a genius use of the Orange Licorice twine, if I do say so myself.  LOL  I don’t decorate for Halloween, but my sister asked if I had made anything else that she could steal to decorate her home.  I think this is definitely for her.  It’s my brother, me and her all in ghost form.  My brother is the first one, wondering why he was blessed with two sisters and instead of brothers.  Poor guy. 🙁

 
It’s hard to get a glimpse of the Wink of Stella glitter pen I used on the inside of the lettering from my camera.  So if you are wondering what that weird looking stuff is, blame my camera for not picking up the cool iridescence of the pen.  Much shinier in person.  LOL  
 
 
To make the sign, you need balsa wood cut to the size you want.  It’s pretty easy to do this yourself as the wood is pretty thin.  I cut the ends to make them look old and distressed then proceeded to just rub my ink pad across it. For the lettering, I needed to tape the wood down on my mat to make sure it didn’t stayed put.
 

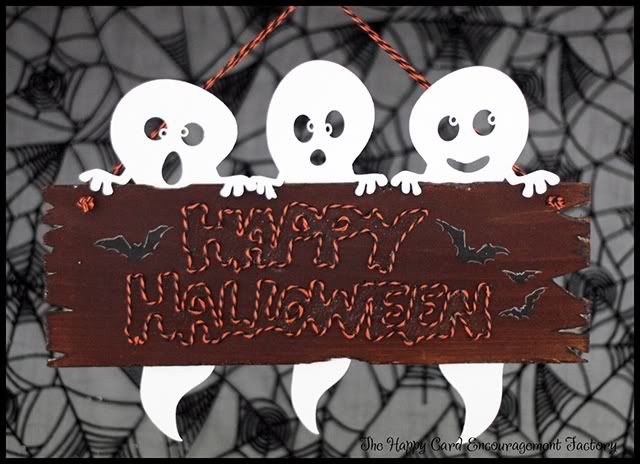
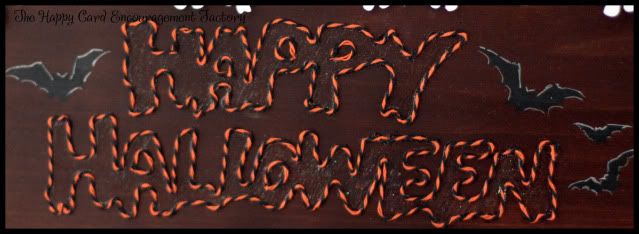
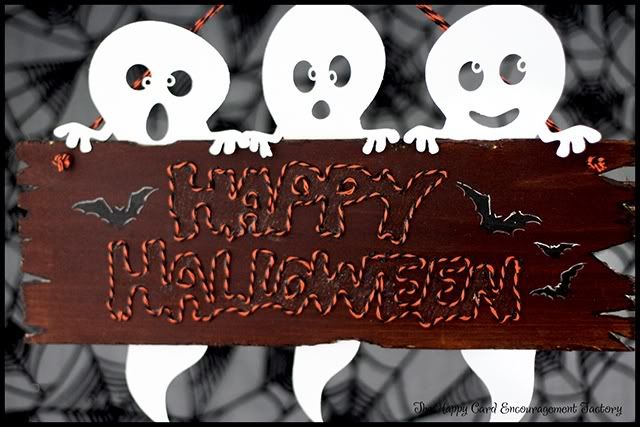
In went my Millennium pen to outline the letters and bats.  (This is why I love my Gazelle so much!) I can’t remember where I got the graphic.  It was before I had my blog and didn’t keep track of such things.  Since the wood is too thick to go under the rollers, I moved them to one end and placed the board vertical versus horizontal on the mat.  Hit cut, and let it do it’s magic.  I then put a bead of glue tracing the letters, and laying the twine around.  Cut out the ghosts and glue to back.  I made them a little under 3″ and cut them in half so they would show the whole ghost behind the sign. I colored in my bats with the ZIG Writer in black, then outlined them with the Calligraphy pen in silver.  I think that is everything.

Hope you enjoyed my sign.  You know I love comments.  Have a great day and happy crafting!

Supplies:

Balsa wood
Orange Licorice by Trendy Twine
Seasoned Halloween (ghosts) by Lettering Delights
Stained with Distress Ink in Walnut Stain
ZIG Memory System Writer in black
ZIG Memory System Calligraphy Metallic in silver
ZIG Memory System Wink of Stella in gl. clear
Kuretake ZIG Millennium in black 03

*Submitted to Anything But A Card challenge

Filed Under: Halloween, home decor, Kuretake ZIG, Trendy Twine

« Spooky Snacks
A Haunting We Will Go »

Comments

  1. Trendy Twine says

    October 24, 2012 at 2:09 pm

    Love this. Such cute Halloween decor. You did a awesome job with the twine 🙂

    Lesley @ Trendy Twine

    Reply
  2. Jamie_G says

    October 24, 2012 at 12:12 pm

    What a GREAT idea Becki!! Beautiful job on the sign.

    Reply
  3. Margaret says

    October 24, 2012 at 12:39 pm

    Super cute sign! I love the little ghouls!! This would look perfect hanging on a door!!

    Reply
  4. snappy scrappy says

    October 24, 2012 at 1:40 pm

    So cute…neat twine use!! Lee-Ann 🙂

    Reply
  5. Scrappy Canuck says

    October 24, 2012 at 2:20 pm

    Hehehehe – this is so cute!!! Love it!

    Reply
  6. Anita says

    October 24, 2012 at 6:48 pm

    This is so cute, love how the sign shows off the TT. Hugs, Anita

    Reply
  7. Mel - The Paper Retreat says

    October 25, 2012 at 1:38 am

    Love this!!!! Adorable Becki!

    Reply
  8. Helen says

    October 24, 2012 at 10:28 pm

    Very cute!!

    Reply
  9. Tracy says

    October 25, 2012 at 1:06 am

    Nice job, that is really cute.

    Reply
  10. Jamie says

    October 25, 2012 at 12:55 pm

    Love this! It turned out amazing!

    Reply
  11. Merry says

    October 25, 2012 at 10:20 am

    Fantastic and so much fun. How lucky is your sister that you like creating and she likes decorating. 🙂

    Reply
  12. Rebecca Wagner says

    October 25, 2012 at 3:26 pm

    Thanks so much everyone!

    Reply
  13. Brigit says

    October 25, 2012 at 7:36 pm

    This is so adorable Becki, I love how you made the Happy Halloween out of the twine, so clever!!

    Reply
  14. Jessica Pascarella says

    October 29, 2012 at 3:47 pm

    What a great sign! Perfect!

    Reply
  15. -Candi says

    October 30, 2012 at 12:59 pm

    OMG this is awesome, I need you to decorate my house!!!

    Reply

Leave a Reply Cancel reply

Your email address will not be published. Required fields are marked *

This site uses Akismet to reduce spam. Learn how your comment data is processed.

About the Designer

Hi, I'm Rebecca. I am a child of God. A loving wife of 29 years. A boy mom. A collector of gadgets, gizmos, and superhero action figures. Making the world more organized one planner at a time. Read More…

  • Facebook
  • Instagram
  • Pinterest
  • Twitter

Looking for Something?

Categories

Copyright

You are welcome to feature or share any article, as long as you use only one image and link back to the specific post. You may NOT edit, crop, remove my watermark, or change my images in any way without written permission.

Republishing posts in their entirety is prohibited. If I somehow produce something that inspires you to create your own, please credit me and link back to my site. Thanks!
  • Blog
  • Home
  • Tutorials
  • About Me
  • Contact Me
  • 3D Projects
  • CGP VIP Group

Join us on Instagram

So, I did a thing. Working on a pain point for Per So, I did a thing. Working on a pain point for Personal size. This is for those of you who think it’s too narrow but don’t want to purchase a new PW binder. Franklin Covey Compact is the next best thing. 

If you have a FFC binder already, we now will have refills for you too! 

#franklincoveycompact #citygirlplanners #personalringplanner #lvmmagenda
Foil lovers... we heard you. Since our foil equi Foil lovers... we heard you. 

Since our foil equipment went down, the messages and emails have not stopped. We know how much you love the look and honestly we love it too.

Replacing commercial foil equipment runs into the tens of thousands of dollars and, like a lot of small businesses right now, that's just not realistic. 

After months of testing with our existing setup, we think we found a way to bring foil back.

It's not mass factory perfect. Occasionally there may be a tiny spot where the foil doesn't pull 100%. Nothing obvious, nothing we wouldn't personally use, and nothing that doesn't meet our standards will ship.

But overall? We think it looks pretty gorgeous.

Before we officially bring foil back…

Would you still want it knowing it's handcrafted and not machine perfect? 

Tell me honestly in the comments. Your feedback will decide this one. 

#foilinserts #foilingtechnique #citygirlplannersinserts #citygirlplanners
Now on to the cutting phase. #citygirlplanners # Now on to the cutting phase. 

#citygirlplanners #stationerylove #plannercommunity #behindthescenes
New notepads in the making. Any guesses? #citygir New notepads in the making. Any guesses?

#citygirlplanners #plannercommunity #plannerlove #citygirlplannersinserts
Nothing ruins a perfectly good month like… bills Nothing ruins a perfectly good month like… bills.

Good news: when everything’s written down, at least the chaos is organized.

Pay it. Check it off. Pretend you’re thriving.

#CityGirlPlanners #AdultingButMakeItCute #BillTracker #PlannerLife #OrganizedChaos
Personal Size planners get a bad rap for one reaso Personal Size planners get a bad rap for one reason…

They’re narrow.

And I get it.
Personal is the perfect middle ground. Bigger than Pocket, fits in your purse, but way more portable than A5.

But the width?
That’s always been the complaint.

Lately I’ve been seeing people try to squeeze Personal Wide into standard Personal binders… and then wonder why the pages stick out.

So instead of making it wider… I went the other direction.

Foldouts.

For 2026, I reworked the layout to give you more planning space without changing the footprint.

Month on one page
Straight into your weekly
Dashboard space (because you know I had to keep that)
And when it’s folded?
Standard Personal Size. Fits your binder like it should.

Now I need your opinion before I finalize this…

What works better in vertical boxes?

Graph (left side)
or
Lines (right side)

Tell me in the comments — Graph or Lines?
Who else misses Micro planners? I found this under Who else misses Micro planners? I found this under a stack of papers. Don’t know how long it’s been chillin under there but I’m going to start using it. Great for quick notes and things you need to dump but don’t need long term.
Field research, planner style. Since the Coach no Field research, planner style.

Since the Coach notebooks are sold out, I grabbed this leather cover on Amazon to test the fit.
Good news: it fits beautifully (and it’s roomy enough for tabs).

Bad news?
I got excited and didn’t read the whole listing.

No snap.
No elastic.
Just vibes.

Luckily I’ve got elastic on hand… but consider this your reminder from someone who learned the hard way:

Read the full listing, friends.

#plannerlife #plannercommunity #a5planner #plannerfinds #citygirlplanners
Sometimes the best combinations aren’t planned… they just happen.

The Aquarelle Sky cover paired with Candy Rush tabs turned out to be one of those moments. The colors line up so perfectly, it looks like they were made for each other.

Just a little unexpected color magic.
Follow Us!

Categories

Archives

Copyright © 2026 · HappyCardFactory Designs