HappyCardFactory Designs

Dream. Create. Inspire.

  • Shop
  • Facebook
  • Pinterest
  • Twitter
  • Instagram
  • Home
  • Our Store
  • Blog
  • Tutorials
  • 3D Projects
    • 3D Crafts
    • 3D Flowers
    • 3D Letters
  • Contact
  • About Me
    • About Me
    • Disclosure
    • Privacy Policy
  • Join Our Group
You are here: Home / tutorial / Make Your Own Glue Dots

Make Your Own Glue Dots

February 7, 2012 by Rebecca Wagner 24 Comments

Alrighty everyone, since you liked my ink dauber tutorial so well, I thought I would post another crafty thing I have done to save money.  Here I am bogarting all the cheap ways I have of crafting, not thinking to share with my fellow penny pincher’s.  I humbly apologize.  ^__^   Paper crafting is a very expensive hobby and I try to save some money where I can.  While I like all the new gadgets, I just can’t always justify the purchase.Now, some of these are definitely not new.  I know there are plenty of others around the ‘net who have similar tutorials but I guess everyone brings there own spin to things.   So if you already know about this, indulge me.  If not, I hope I have helped in some way.  As always, it also has to be pretty easy and not too time consuming.  Otherwise, I might as well purchase the product instead.  That said, these homemade glue dots do take a little more time than the daubers but I still think they are in the realm of a DIY project.  Let me know what you think!

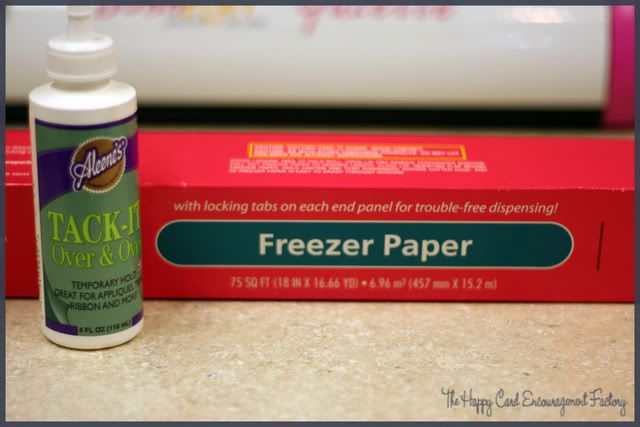
Once again, we only need two things for this – Aleene’s Tack It Over and Over (also good for re-sticking mats and the back of unmounted rubber stamps) and two 4X6 pieces of wax paper.  Edited to add:  A kind fellow crafter (thanks, Lenae!) let me know I keep saying wax paper but have a picture of freezer paper.  Both have a slick side and plain side.  I have tried both and I would recommend the WAX PAPER not freezer paper.  While the freezer works good in a pinch, I would definitely used the wax.  I have a little harder time getting them off the freezer whereas I had no problem getting them off the wax.

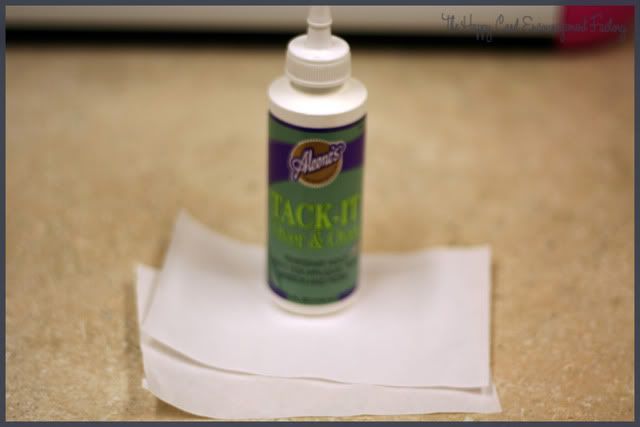
Take one sheet of your waxed paper shiny side up.  Start squeezing out glue globs to the size you want your dots to be.  I usually make a few rows of small, medium, large dots and a few lines for ribbons and such.

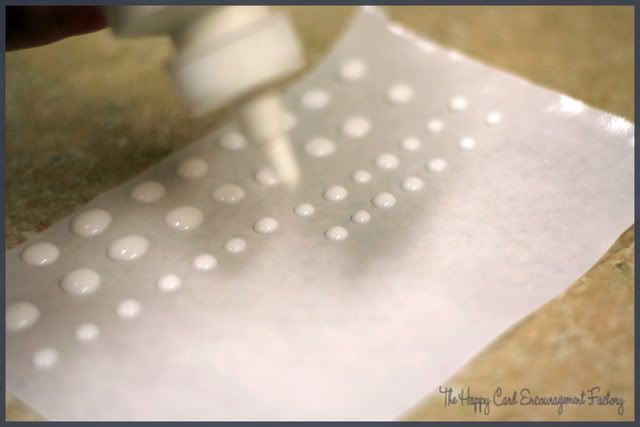
Let dry till they are clear.  That will depend on the moisture conditions of your home.  My craft room is in the basement so it takes a little longer, about a day/day and a half.  Sometimes before they are completely dry, I will add another glob on top of existing ones to add more dimension.  So I can get a real good lift if I need it.

When dry, add the second piece of waxed paper shiny side down and enjoy!  Since I am still on the same bottle of Aleene’s, I can’t tell you what the cost savings are.  I know a bottle is about $5.99 at Michaels and if you have a coupon, that brings it down to $3.59.  You can make a whole heck of a lot of glue dots for that price, I guarantee!

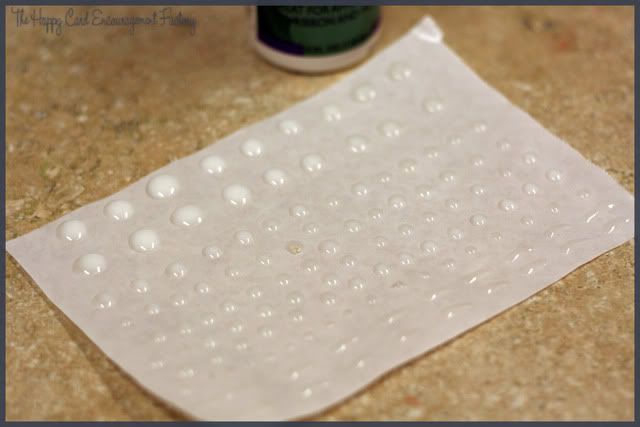
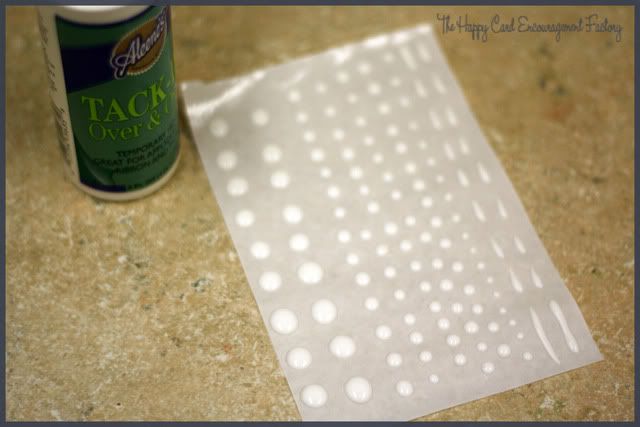
Here they are almost dry.  As you can see the bigger ones take a little longer obviously.  One thing I would not recommend is using your heat tool.  I did that one time and they bubbled up.  Should have known.  It’s best to make them a few days before you really need them.  Hope this helps all you crafters save some money.  If you have any questions, feel free to leave it in the comments and I will get back to you as soon as possible.  Have a good day and happy crafting!

Filed Under: DIY, homemade, tutorial

« ..And the Truth Shall Make You Free
Valentine Kisses »

Comments

  1. Therese says

    February 7, 2012 at 2:58 am

    That’s a nifty (and thrify) idea! I will have to find that stuff! As far as the re-sticking mats goes, do you think it works better than the Slice re-sticking spray?

    Reply
  2. Becki says

    February 7, 2012 at 3:02 am

    I never used the Slice spray. I did hear that it was pretty good. I know I like the Aleene’s better than some of the re-sticking sprays I have used in the past.

    Reply
  3. SugarGem says

    February 7, 2012 at 4:44 am

    This is great. OK stupid question…. Is freezer paper the same as wax paper?

    Reply
  4. -Candi says

    February 7, 2012 at 1:55 pm

    This is a great idea, my almost 8yr old goes insane with the glue dots so this way she could make her own and I wouldn’t be obsessive about her taking all of my packaged ones 🙂

    Reply
  5. Becki says

    February 7, 2012 at 2:07 pm

    Oops, I just saw where I wrote wax paper instead of freezer paper. For this application, there is no difference. You would use the shiny side on both types. Sorry, all.

    Reply
  6. Judy says

    February 7, 2012 at 4:34 pm

    Very interesting … I want to try this 🙂
    Hugs, Judy

    Reply
  7. Bee's hive says

    February 7, 2012 at 5:08 pm

    Love this Becki! I tried the tack it over for mat resticking, the instructions I received said 1/2 water 1/2 glue but I would really reduce the glue…it was WAY too sticky. I’m so going to use this technique for diamond makers such as myself:)

    Reply
  8. Bee Burg says

    February 7, 2012 at 9:17 pm

    That’s a great idea! Do you cover the small ones once they’re dry and you are waiting for the big ones to dry out or it doesn’t matter if they stay uncovered for a while?

    Reply
  9. Becki says

    February 7, 2012 at 9:20 pm

    I would leave them uncovered till the big ones dry. I would be worried about sticking.

    Reply
  10. Anonymous says

    February 26, 2012 at 3:31 pm

    I save the backing sheet from postage stamps and other label type items to put my dots on (fold the sheet in half and only put dots on one half so you’ll have the other half to close when dry). Can’t tell you how many dots I’ve gotten all over stuff when I didn’t cover them. Invariably set something down on them. Elaine

    Reply
  11. Becki says

    February 27, 2012 at 9:29 pm

    Elaine, that’s a good idea. I also can’t tell you how many dots have bit the dust due to me not looking and placing my paper stacks everywhere. LOL

    Reply
  12. Tracy Suzanne says

    March 14, 2012 at 2:50 am

    Thanks for all the great tips Becki. I’m pinning this one and now I’m a happy new follower.

    Hope you’ll stop by and visit me @ Cotton Pickin Cute

    Hugs…Tracy 🙂

    Reply
  13. Becki says

    March 14, 2012 at 3:25 am

    You’re welcome, Tracy. Thanks for stopping by and becoming a follower!

    Reply
  14. Fromm the heart says

    April 28, 2012 at 4:56 pm

    I am so excited about this idea!! I was going to order glue dots and they were more than a bottle of the glue you use here and that was for not many of them. I love how you can make different sizes of the dots too! I had been saving the dots I had for fear of buying more. Iam on a budget too. I still have some left, I’ll save the wrapper they are on and reuse it when making more!

    Reply
  15. BOBBIEJEAN says

    May 26, 2012 at 6:14 am

    useing Aleens Tak it over and over would make me think that the hold would not be permanant. Id worry that the pieces would soon fall apart. Ive seen this happen with a few cheap snail runners. Love the idea Ill have to try it. I have Aleens tack it over&over for the mat stickyness, I was gonna try that too but My kids bought me new mats as a gift before I needed to do it. Thanks for everything!

    Reply
  16. Rebecca Wagner says

    July 1, 2012 at 10:24 pm

    Glad you guys liked it! BobbieJean, I would not use these for anything 3D like a box. You are right, the hold would not be enough to keep it together for long periods of time. However, if its a card or LO that will go into a book, I think they are fine.

    Reply
  17. apillo says

    April 7, 2013 at 5:18 am

    This may be a stupid question but what do you use these for?

    Reply
    • Rebecca Wagner says

      April 12, 2013 at 6:19 pm

      Not a stupid question. I use these mostly for my card projects to glue the layers down and add some dimension. 🙂

      Reply
  18. Cherie says

    May 3, 2013 at 4:19 pm

    Wow! What a clever idea! TFS!

    Reply
    • Becki Wagner says

      June 2, 2014 at 12:45 pm

      Thanks, Cherie! You’re welcome.

      Reply
  19. Beth F says

    May 31, 2014 at 12:05 pm

    I pinned this post earlier, but I think I might try these out today! Thanks for the tips! I have everything I need on hand.

    Reply
    • Becki says

      June 2, 2014 at 12:46 pm

      You’re welcome, Beth. Let me know how they turn out!

      Reply
  20. Martha says

    March 23, 2023 at 9:29 pm

    Can you use any other type of glue to make these? TIA

    Reply
    • Rebecca Wagner says

      June 28, 2023 at 3:19 pm

      I honestly don’t know. You may have to play around to see which glue dries clear.

      Reply

Leave a Reply Cancel reply

Your email address will not be published. Required fields are marked *

This site uses Akismet to reduce spam. Learn how your comment data is processed.

About the Designer

Hi, I'm Rebecca. I am a child of God. A loving wife of 29 years. A boy mom. A collector of gadgets, gizmos, and superhero action figures. Making the world more organized one planner at a time. Read More…

  • Facebook
  • Instagram
  • Pinterest
  • Twitter

Looking for Something?

Categories

Copyright

You are welcome to feature or share any article, as long as you use only one image and link back to the specific post. You may NOT edit, crop, remove my watermark, or change my images in any way without written permission.

Republishing posts in their entirety is prohibited. If I somehow produce something that inspires you to create your own, please credit me and link back to my site. Thanks!
  • Blog
  • Home
  • Tutorials
  • About Me
  • Contact Me
  • 3D Projects
  • CGP VIP Group

Join us on Instagram

Even though you were a pain in my butt and tried t Even though you were a pain in my butt and tried to eat everybody, I still loved you a lot. Have fun on the other side of the rainbow bridge, Quincy. You will be greatly missed. ❤️
When aliens ride unicorns under a glowing jellyfis When aliens ride unicorns under a glowing jellyfish sky, your planner cover better rise to the occasion. Judy understood the assignment.

Beam us up, because Earth stationery is officially too basic.

#CityGirlPlanners #PlannerCoverGoals #CosmicStationery #UnicornVibes #AlienApproved #JellyfishDreams #OutOfThisWorldStyle #PlannerObsessed #WritingInStyle #NotebookNirvana #DeskDecorGoals #SciFiMeetsStationery #GalacticPlanning
Well, bless my checklist and pass the microfiber c Well, bless my checklist and pass the microfiber cloth. The Hot Mess Express Recovery Plan is almost ready to roll out. Because let’s be honest—some of y’all aren’t cleaning, you’re performing an exorcism on your kitchen.

I’m hustling behind the scenes to get this and the rest of the Snark Pack™ inserts listed very soon. Stay tuned… or at least pretend to be productive until then.

#HotMessExpress #PlannerInserts #CleaningSchedule #RealLifePlanning #SnarkPack #PlannerHumor #ProductivityButMakeItFunny #DomesticDisasterRecovery #PlannerCommunity #CityGirlPlanners #NewReleaseTease #InsertLaunchImminent #stationerylovers
PLANNING: Because ‘Winging It’ Was a Disaster. PLANNING: Because ‘Winging It’ Was a Disaster.

Been there. Done that. Forgot where I put the t-shirt. 😵‍💫

📒 Enter: my trusty planner (aka my emotional support binder).
🧠 Fewer meltdowns.
📝 More checkmarks.
🙃 Still chaotic, but now it’s organized chaos.

Tag your favorite hot mess who needs this kind of structure in their life. 💅

#SnarkSeries #PlannerLife #HotMessExpress #CityGirlPlanners #FunctionalButFunny
Sneak peek alert! The Snark Series is coming in ho Sneak peek alert! The Snark Series is coming in hot—and slightly unhinged. “Look at Me Adulting” and “CEO of This Disaster” are just the beginning. More inserts are in the works, because apparently chaos is a recurring event. These will be available in Half, A5, and up—because tiny inserts can’t handle this much dysfunction.

Stay tuned… the sass storm is almost here.

#PlannerHumor #SnarkyStationery #PlannerInserts #CityGirlPlanners #A5Planner #HalfLetterPlanner #GettingMyLifeTogetherish #SnarkSeries #HotMessPlanning #LookAtMeAdulting #CEOofThisDisaster #StationeryWithAttitude #ComingSoon #GenXApproved
Sneak peek time 👀 — the #SnarkSeries is comin Sneak peek time 👀 — the #SnarkSeries is coming in hot, and honestly... “I opened the planner and that counts” might be the most accurate adulting metric ever created. 🤷‍♀️ If your day runs on caffeine, chaos, and bare minimum effort with a sprinkle of sarcasm, you’re gonna love what’s next.

💥 Tag your favorite planning partner-in-chaos—because surviving the week is a team sport.

#HotMessExpress #PlannerHumor #StationeryLover #PlannerChaos #RealLifePlanning #CityGirlPlanners #OrganizedChaos #ProductivityWithPersonality #YoureDoingGreatSweetie
Coming in hot(ish)... the Snark Series is almost h Coming in hot(ish)... the Snark Series is almost here. 💥 Planners, get ready to embrace the chaos with style, sarcasm, and slightly frayed nerves. You’re doing great, sweetie. 💅 #SnarkSeries #HotMessExpress #PlannerChaos

Who’s ready for this? Drop a 🧨 if you thrive under planner pressure.
✨ Bookmark lovers, it’s decision time! ✨ Ou ✨ Bookmark lovers, it’s decision time! ✨

Our new bookmarks are coming this weekend, and you get to choose:
📖 Glossy or Matte (including the luxe FineLeather matte—limited time only!)
📖 Square or Rounded Corners
📖 Tassel Color: Black, Gold, or Pink or none at all

Once the FineLeather matte runs out, all matte bookmarks will have our standard matte finish. Don’t miss out on this limited option! Which combo is calling your name? 💖📚 

#bookmarklove #planneraccessories #bookish #citygirlplanners #plannerlove #stationerylove
Do you prefer your bookmarks with or without tasse Do you prefer your bookmarks with or without tassels? Here’s a look at our newest glossy-finish designs—no tassels, no rounded corners, just sleek and shiny. Tomorrow, I’ll be showing off the matte leather-textured finish. Which style do you love most?

#bookworm #booklover #bookmarks #books #citygirlplanners #plannercommunity
Follow Us!

Categories

Archives

Copyright © 2025 · HappyCardFactory Designs