HappyCardFactory Designs

Dream. Create. Inspire.

  • Shop
  • Facebook
  • Pinterest
  • Twitter
  • Instagram
  • Home
  • Our Store
  • Blog
  • Tutorials
  • 3D Projects
    • 3D Crafts
    • 3D Flowers
    • 3D Letters
  • Contact
  • About Me
    • About Me
    • Disclosure
    • Privacy Policy
  • Join Our Group
You are here: Home / homemade / Homemade Washi Tape

Homemade Washi Tape

February 22, 2012 by Rebecca Wagner 22 Comments

Hello everyone, I am back again with another money saving tutorial for you – homemade Washi tape!  The Make the Cut forum has been a buzz lately with talk of making your own tape.  Since I have never seen nor purchased this stuff before I had to check it out.  It looks pretty cool but with all the ribbon I have I can’t see putting money into another craze.  And I do mean craze!  Now that I know what it is, I see it everywhere.  Seems I am fashion two seasons ago once again.That’s when I thought maybe there was something to making your own.  It is really cute stuff but again I don’t see myself using it all too often.  Oh but I love to make things so why not give it a go.  I’m sure there is money savings if you already have the majority of the supplies on hand.  So lets get to it!

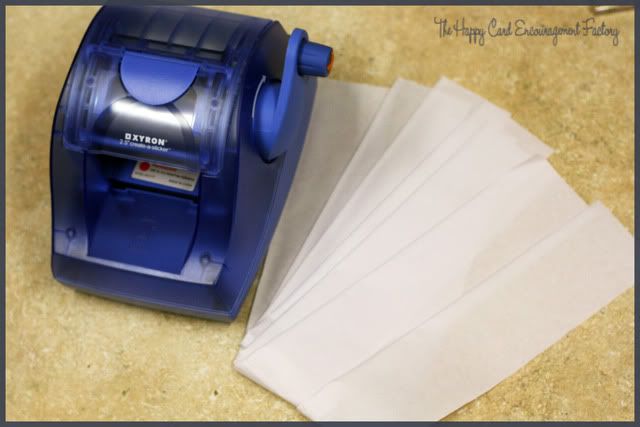
First off, you will need two items to start with (boy, I’m seeing a pattern here) – a Xyron or similar sticker maker that leaves a backing and whatever tissue paper floats your boat.  I used white here but I heard there are lots of nice patterned tissue papers available.  I haven’t seen any but that just makes this project more interesting.  The rest of the supplies I use are optional.

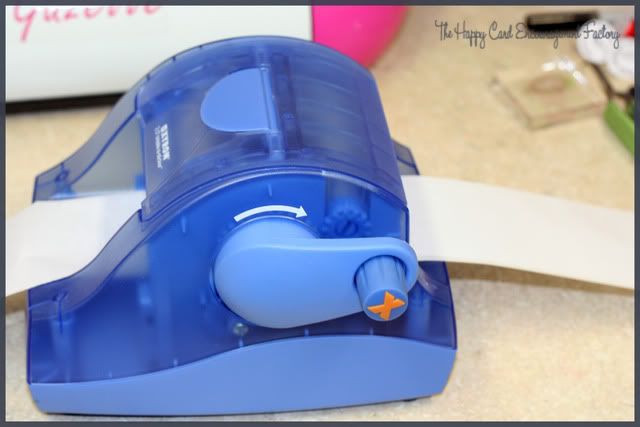
Since I have the 2.5″ Xyron, I cut my tissue paper into strips of 2.5″ wide.  Then you just take your paper and proceed to crank it through.  Believe it or not, it goes in pretty smooth without a lot of fuss.  Out of 10 strips, only one crinkled and I wanted it to.

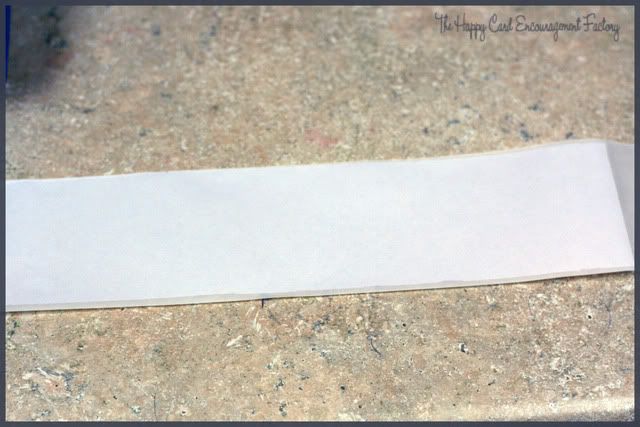
See, so nice and smooth.  Now, you could stop there but I am experimenting so its no holds barred!  I got out lots of inky goods to slap on my new tape.  With the backing on there it makes it sturdy enough to not worry about getting it soaked.

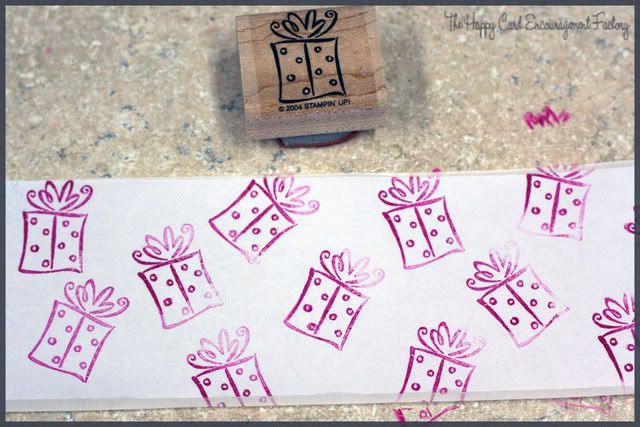
Here it is with some chalk ink and a present stamp.  It was kind of hard to know what kinds of designs I wanted.  I have no idea what I will use the tape for yet.

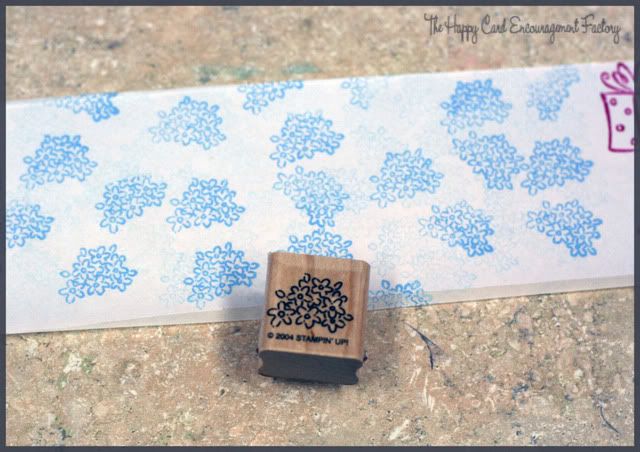
Another chalk ink in two different blues with a flower stamp.  Nice effect.

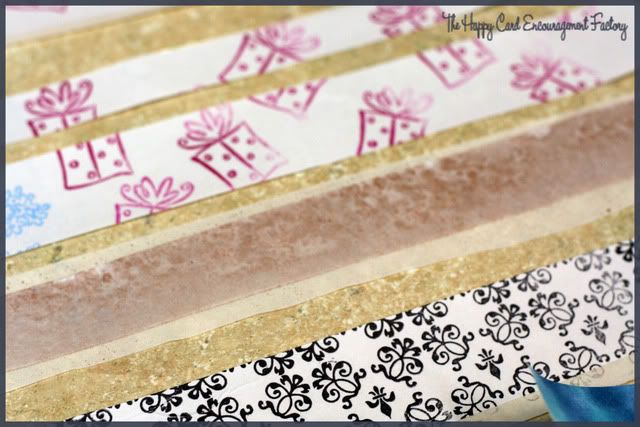
I cut them down into strips of about 1″.  I am thinking that would look better on a project and easier to manage.  Who knows.  The brown tape was made with my homemade Glimmer Mist, the next was a background stamp with black pigment ink then on the lower right corner is done with Faded Jeans and Broken China Distress Inks.

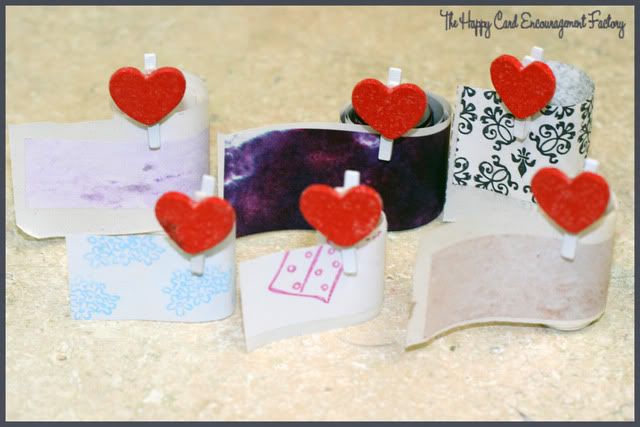
Here are a few all dried, rolled and ready to go.  I forgot to take a picture of the purple one.  It is two Distress Inks daubed on and then spritzed with a little water to blend them.  I think I like that one the best.

I just want to say, I know they are not the prettiest tapes I could have made but this was more about the method then showing my juvenile looking tapes.  I had lots of fun making these so practice makes perfect.  I am definitely going to try other methods and colors as soon as I go buy more adhesive.  ^__^  Any ideas?

Hope this tutorial inspired you to create your own and save a little bit of money!  Let me know if you try your hand at making Washi tape.  Have a great day and happy crafting!

Filed Under: DIY, homemade, Washi Tape

« New Free Files
Thanks for Everything »

Comments

  1. Kasi says

    February 22, 2012 at 2:24 pm

    Great tutorial! You could even use the tissue paper that already has designs on it as well.

    Reply
  2. Angi Rankin says

    February 22, 2012 at 2:46 pm

    Great idea! I’m going to have to give it a try. Thanks for the great tutorial.

    Reply
  3. Becki says

    February 22, 2012 at 5:50 pm

    Thanks ladies! Kasi, I heard there was patterned paper, I just have yet to find it.

    Reply
  4. Alyssa Leanne says

    February 22, 2012 at 6:04 pm

    Thanks for the tutorial Becki, I love it! I may have to give it a try today. It’s making me wish I had more background stamps 😛

    <3 Alyssa

    Reply
  5. Becki says

    February 22, 2012 at 6:05 pm

    I know, Alyssa. I was thinking the same thing. Most of my stamps are your sentiment ones. LOL

    Reply
  6. Rhonda Miller says

    February 22, 2012 at 6:23 pm

    What a great idea. I’ve wanted to try Washi tape, but didn’t want to spend the money. I just happen to have all the supplies for this. TFS.

    Reply
  7. Becki says

    February 22, 2012 at 6:28 pm

    Thanks, Rhonda. That’s what I am here for. ^__^

    Reply
  8. JH Schott says

    February 23, 2012 at 4:49 am

    So is there a reason why you chose to use chalk instead of ink on the tissue paper? I’m thinking pigment ink, heat set would work…OOOOMMMMMMMGGGGG, what about embossing powder heat set, THEN run through the tape runner?! Just sayin’….I’m not really into this either, but it’s a cool tutorial. Oh, just thought that around Christmas time (or after!) there’s usually patterned paper and red/green paper as well.

    Reply
  9. Becki says

    February 23, 2012 at 4:58 am

    Hi Jan, the reason I used chalk ink was because it was within arm’s reach. LOL The black ink is pigment and I used Distress Ink on the purple and blue tapes.

    Embossing powder sounds like a great idea but I had heard it is much better to ink and work with the tissue paper after it has a backing. Doesn’t hurt to try both ways. I also would be careful heating the tissue as it could go up in flames pretty quick. I use a Wagner heat gun from Home Depot for my embossing and heating needs so maybe the actual hair dryer type embossing ones don’t get as hot. LOL I don’t want to burn down my house just from crafting. What would the hubby say? ^__^

    Reply
  10. G-ma says

    February 23, 2012 at 1:53 pm

    Thank you for the great tutorial…I’m going to get some tissue paper and try it.

    Reply
  11. Becki says

    February 25, 2012 at 3:31 pm

    G-ma, let me know how it comes out!

    Reply
  12. Annie's Paper Boutique says

    March 1, 2012 at 6:53 am

    Wow, you are so creative!

    Reply
  13. Becki says

    March 1, 2012 at 6:37 pm

    Thanks girlie!

    Reply
  14. Therese says

    April 4, 2012 at 1:49 am

    This is so clever Becki! I need to make me some washi tape, and if I do…I’ll post a pic for ya.

    Reply
  15. Rebecca Morefield-Wagner says

    April 4, 2012 at 3:44 am

    Cool, can’t wait! Make sure you take a little more time than me. I just don’t have a lot of image stamps to make these look better.

    Reply
  16. Fromm the heart says

    April 28, 2012 at 5:07 pm

    I like your way better than the other one I saw using tacky tape(that stuff is pricy) Would you please do a tutorial on the glimer mist you made and the alchol ink you made?

    Reply
  17. Rebecca Morefield-Wagner says

    April 29, 2012 at 3:12 am

    Thanks, Fromm the heart! As far as the tutorial for glimmer mist and alcohol ink, I plan on getting to those eventually. ^__^ I just never use the alcohol ink, I was thinking the other day why in the world I even made it. LOL

    Reply
  18. Rebecca Morefield-Wagner says

    April 30, 2012 at 12:09 am

    Sandra, that is a great idea! Thanks for posting it so others can benefit. I appreciate it!

    Reply
  19. Sandra says

    April 29, 2012 at 8:23 pm

    Hi, a cheaper way again is to use medical tape for gauze bandages, it is called micropore tape here in NZ. I use inks or watered down acrylic paint, and then stamp. To store it I put it on a piece of baking paper, I think you call it parchment paper. Works very well for me.

    Reply
  20. Anonymous says

    June 14, 2012 at 11:13 pm

    I just love all your money saving tips..Thank you for sharing..gonna try all of them.

    Reply

Trackbacks

  1. Linky Party Finalists says:
    May 20, 2015 at 1:21 pm

    […] Homemade Washi Tape by The Happy Card Encouragement Factory […]

    Reply
  2. How-to: Iris Folding Card says:
    May 20, 2015 at 2:45 pm

    […] from our National Craft Month Linky Party – she was actually the grand prize winner with her homemade washi tape.  We are delighted to present you with this great tutorial featuring a really cool technique […]

    Reply

Leave a Reply Cancel reply

Your email address will not be published. Required fields are marked *

This site uses Akismet to reduce spam. Learn how your comment data is processed.

About the Designer

Hi, I'm Rebecca. I am a child of God. A loving wife of 29 years. A boy mom. A collector of gadgets, gizmos, and superhero action figures. Making the world more organized one planner at a time. Read More…

  • Facebook
  • Instagram
  • Pinterest
  • Twitter

Looking for Something?

Categories

Copyright

You are welcome to feature or share any article, as long as you use only one image and link back to the specific post. You may NOT edit, crop, remove my watermark, or change my images in any way without written permission.

Republishing posts in their entirety is prohibited. If I somehow produce something that inspires you to create your own, please credit me and link back to my site. Thanks!
  • Blog
  • Home
  • Tutorials
  • About Me
  • Contact Me
  • 3D Projects
  • CGP VIP Group

Join us on Instagram

Just over here writing rainbow-colored lies into m Just over here writing rainbow-colored lies into my planner so I can feel accomplished.

The Obsessive List Maker insert isn’t judging. She’s enabling. What’s one thing you’re putting on your list just to cross it off?

#citygirlplannersinserts #plannervibes #rainbowstationery #fridayplanning #plannerhumor #colorcodedchaos #paperandplans #citygirlplanners #filofaxmalden
🌀 THE OVERTHINKER’S LOG A safe space for spir 🌀 THE OVERTHINKER’S LOG
A safe space for spirals, assumptions, and imaginary arguments you definitely won.
⠀
Break down the mental chaos with prompts like:
— What actually happened
— What I made up about it
— How I might be overreacting (but also maybe not?)
⠀
Validation meets self-awareness… reluctantly.
⠀
#overthinkerslog #plannerhumor #snarkpack #mentalmayhem #citygirlplanners #emotionallyexhaustedbutorganized
🧠 FUNCTIONAL? DEBATABLE. A weekly layout for wh 🧠 FUNCTIONAL? DEBATABLE.
A weekly layout for when you’re pretending to have it together—but not too hard.
⠀
✅ Things I might do
❌ Things I will absolutely avoid
☕ Caffeine levels? Questionable.
💀 Motivation? Bribed at best.
⠀
Plan-ish your week without all that “productive” pressure.
⠀
#functionalplanner #snarkpack #weeklylayout #plannerhumor #citygirlplanners #mentalmessbutmakeitcute
🧠 BRAIN DUMP (a.k.a. mental unclogging) When yo 🧠 BRAIN DUMP (a.k.a. mental unclogging)
When your thoughts are doing the cha-cha but your brain forgot the steps…
⠀
Write it all down. Sort it out later. Or never. Honestly, just getting it out is a win.

✨ For when you’re 3 tabs away from a system crash.
⠀
Part of the functional but frazzled collection from CityGirl Planners.
⠀
#brainfoglog #braindumpinsert #plannerhumor #mentalclutter #citygirlplanners #executivedysfunctiontools #plannerlife #stationerylove #plannercommunity
🚨 CRAP I’M AVOIDING 🚨 A to-do list for pro 🚨 CRAP I’M AVOIDING 🚨
A to-do list for procrastinators, avoiders, and executive dysfunction overachievers.
⠀
Because if you’re not going to do it today, you might as well write it down and pretend.

📝 Comes pre-judged with checkboxes for “Nope,” “Still Nope,” and “Maybe Tomorrow.” 😁
⠀
Part of the Snark Pack™ collection. For when your planner needs to stop lying and start snarking.
⠀
#avoidancewithstyle #snarkpack #plannerhumor #procrastinationqueen #citygirlplanners #crapimavoiding
Built the new site myself because, of course, I’ Built the new site myself because, of course, I’m cheap. Pretty sure I spent 57 hours coding just the mobile view alone. 😣

But hey, now you can actually find what you need without wanting to throw your phone.

Easy to browse, quick to shop, made with love (and probably too much caffeine).

Check it out and let me know if you find a hiccup. I’ve got bug spray and snacks.

#plannerlife #stationerylove #smallbizlove #citygirlplanners #organizedchaos #plannergirl #frugalaf
💸 BUDGET? NEVER HEARD OF HER. 💸
A financia 💸 BUDGET? NEVER HEARD OF HER. 💸
A financial reality check for emotional spenders, impulse buyers, and those of us who “needed” the 7th scented candle.
⠀
Track regrets, justify chaos, and maybe remember that bill you keep dodging. 🛍️ Retail therapy is not therapy. (But also… maybe.)
⠀
⠀
#BudgetingWithFeelings #ImpulseBuySurvivor #PlannerHumor #CityGirlPlanners #SnarkyStationery #FinancialGlowDown
🔥 BURNOUT BINGO 🔥 Because if you’re going 🔥 BURNOUT BINGO 🔥
Because if you’re going to spiral, you might as well make it interactive.

5 in a row = mandatory break. That’s the law. Comes with space to plan your comeback (aka cry and then try again).
⠀
📦 Available in A5 size and larger– because chaos is cuter when it’s hole-punched.

💬 Tag someone who’s one “I’m fine” away from blackout bingo.
⠀
#PlannerHumor #BurnoutBingo #SnarkyStationery #MentalHealthAwareness #PlannerCommunity #CityGirlPlanners #RealTalkPlanning
Buffering… Please stand by. Because sometimes y Buffering… Please stand by.

Because sometimes your brain reboots mid-sentence and forgets why you walked into the room.

💜 Perimenopause: it’s not a glitch, it’s a feature.

#PerimenopausePower #BrainFogButMakeItCute #PlannerChaosProtocol #StickersThatUnderstand
Follow Us!

Categories

Archives

Copyright © 2025 · HappyCardFactory Designs