HappyCardFactory Designs

Dream. Create. Inspire.

  • Shop
  • Facebook
  • Pinterest
  • Twitter
  • Instagram
  • Home
  • Our Store
  • Blog
  • Tutorials
  • 3D Projects
    • 3D Crafts
    • 3D Flowers
    • 3D Letters
  • Contact
  • About Me
    • About Me
    • Disclosure
    • Privacy Policy
  • Join Our Group
You are here: Home / crafts / Homemade Crinkle Ribbon

Homemade Crinkle Ribbon

March 21, 2012 by Rebecca Wagner 16 Comments

Ya know, I think I like saving money making my own products to craft with than actually crafting.  ^__^  Today’s project is no exception.  I don’t know why it is so fun to make my own crinkle ribbon but it is.   I love mixing colors and seeing how beautiful it comes out.It’s pretty easy and can be made with a variety of different inks.  Whatever you have on hand will most likely work.  Here’s my products:  Seam Binding in White (Hug Snug is the only brand I could find), water in a spritzer and ink.  I am using Tim Holtz Distress Ink because I like the colors, they blend/bleed together pretty well and super easy to use.  I have also used homemade Glimmer Mist (that’s a tutorial for another day) and chalk inks.

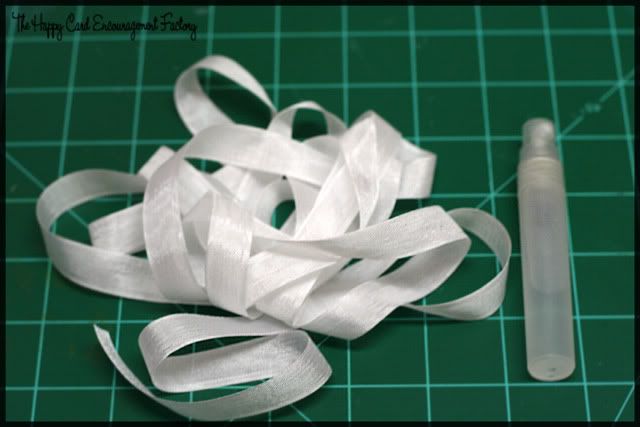
Pull out as much binding as you think you are going to need/want in that particular color.  Here I pulled out about 3 yards.  Just start spritzing the binding and scrunching with your hands as you go.

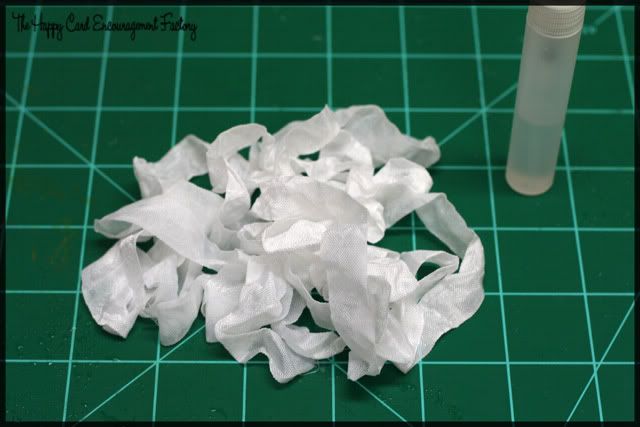
Here it is after.  I wouldn’t recommend getting it too wet at first.  I have seen some crafters make theirs where you could ring them out and get a cup full of water.  I prefer it a little drier, just barely damp.  When you use Glimmer Mist, it’s wet anyway so it gets kind of messy and hard to get gradient colors if everything is soaking.  Make sense?  Hope I am explaining that right.  😀

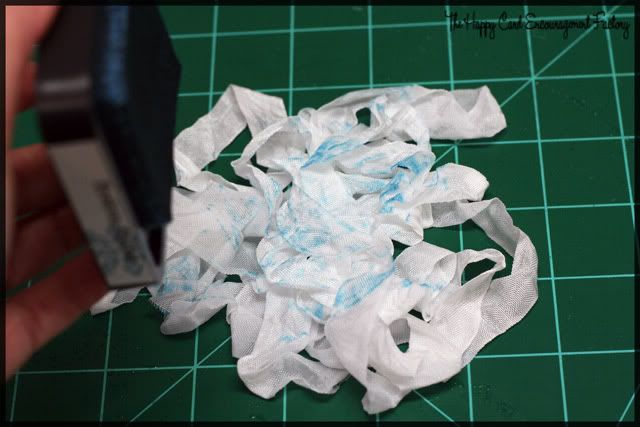
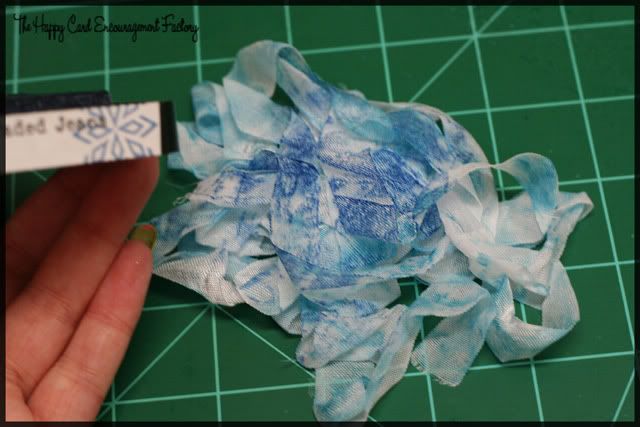
Another reason I like my binding a little drier is when using Distress Inks, I can get better control of blending the colors.  The first color I used for this tut is Broken China.  Just keep daubing the whole pad and tossing till you get the color you want.

Then I used Faded Jeans.  Use the same method of daubing and tossing until you get the desired color and effect you need for your project.  Something to note:  when you are inking, the colors are going to be darker than the finished product.  So don’t worry about over coloring.

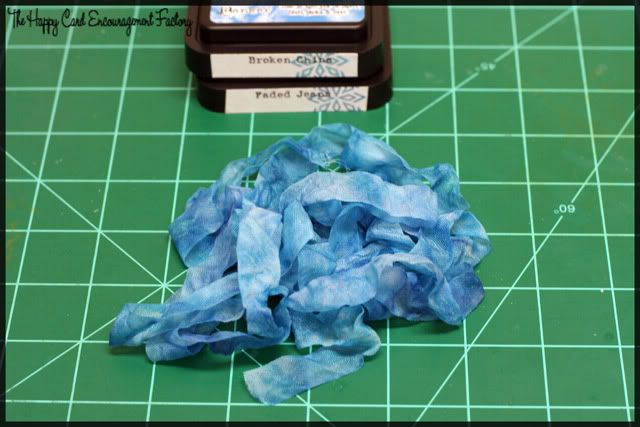
When I got the color I wanted, I spritzed it lightly again and scrunched.  This is the reason I keep it drier when using Distress Inks.  They are made to blend wonderfully with water.  So I get the effects I want with the second spritz.  So pretty!

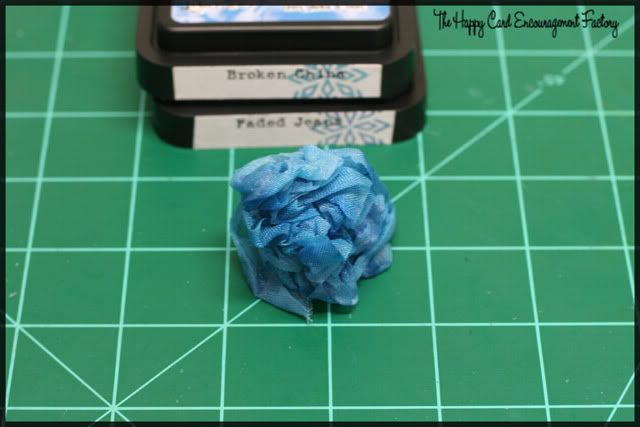
Now take your finished ribbon and manhandle it into a ball.  Do not make it a smooth ball.  The idea is to keep it smooshed.

The drying part can be done in several ways.  You can just leave the ball alone till it’s dry or use your embossing tool.  See mine?  It’s an industrial strength one I bought at The Home Depot.  Can you guess why I love it?  Aside from the fact that it has my last name.  No losing this baby at crops, huh?  It drys and embosses so lightening fast!  I mean, move your fingers as they are about to melt fast.
Disclaimer:  It’s probably not real craft friendly, get one at your own risk.  ^__^

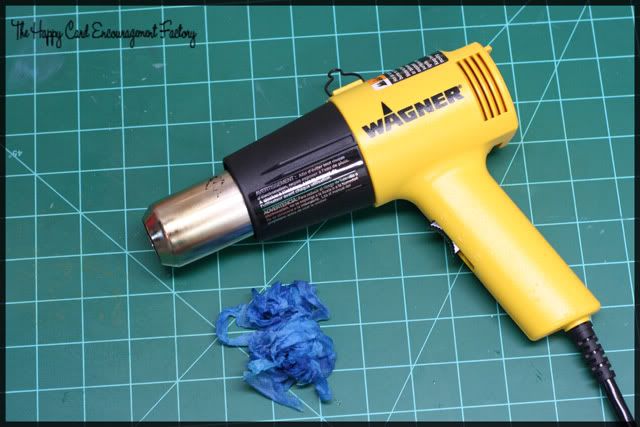
Now the problem with being impatient like me is, when you use the dryer method the heat straightens your new ribbon a bit.  You know like when you are too lazy to iron your pants so you just throw them in the dryer?  Ya, like that.  I just happen to like mine super duper crinkly so I usually leave it alone for a few days.  You may like yours a little less wrinkly but for the purpose of this tutorial I needed it dry fast.

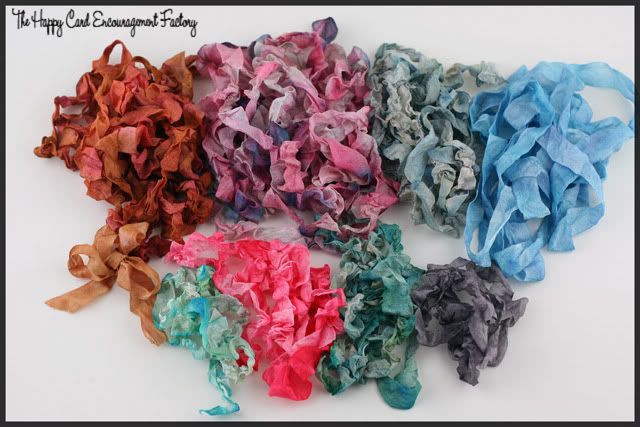
Here are ones I made previously.  As you can see, they are really wrinkly if left to dry naturally compared to the blue I just used the dryer on.  I made a few with Distress Inks and some my homemade Glimmer Mists.

OK, let’s do some really bad math.  I paid $21.35 for two rolls with shipping.  ($7.50 a piece last August, they have since gone up in price to $9.50 at ZipperStop)  You get 100 yards in a roll.  The cheapest I could find for sale already finished was $2.80 on Etsy for 3 yards.  That’s .93 a yard, mine are .11 a yard if you use inks you have laying around.  Savings bonanza!  And with a 100 yard roll, you have a whole bunch of colors to play with.  Use the ribbon straight or crinkly.  Your choice.

Hope you enjoyed another one of my crafty money savers.  Keep checking back to see what other dollar saving ideas I can find for you.  Have a great day and happy crafting!
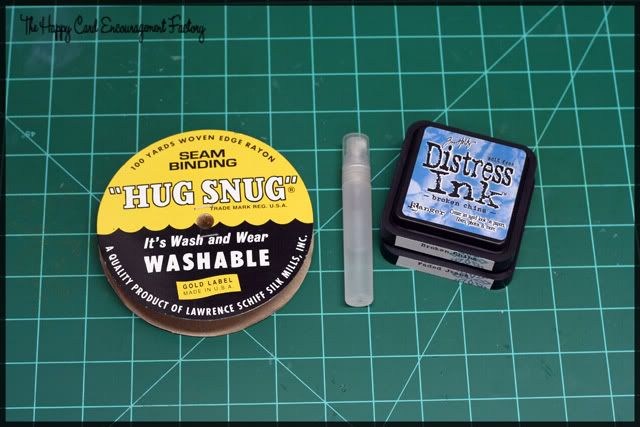
Supplies:

seam binding
water in spritzer bottle
any kind of dye ink


Filed Under: crafts, Crinkle Ribbon, distress ink, DIY, homemade, tutorial

« Butterfly Catch-All
Jewelry Box »

Comments

  1. -Candi says

    March 21, 2012 at 4:43 pm

    I’m starting a love hate relationship with you…. I LOVE these ideas, I hate that I’m never going to get any crafting done either because I’ll be too busy playing and making the things from your tutorials hehehe Oh well either way it’s crafty therapy 🙂

    Reply
  2. Becki says

    March 21, 2012 at 4:45 pm

    Hehehe, glad I could be of some service to you, Candi.

    This is also why I never get any crafting done. LOL

    Reply
  3. Bee Burg says

    March 21, 2012 at 4:57 pm

    You know the 1st times I saw crinkly ribbon I hated it, I thought it looked unkept and messy… but it’s starting to grow on me… 😉 By the time I give in the fad will be over though!… LOL 😉

    Reply
  4. Becki says

    March 21, 2012 at 5:00 pm

    I think it can look that way. Especially the way I like it, super wrinkly. I have seen it on a lot of projects and it just looks so vintage and girly. I love it even though I don’t use it often.

    Reply
  5. teachdanz says

    March 21, 2012 at 6:33 pm

    I make my own too:-) I love to use alchohol inks to color mine as well as smooch spritz. I will have to give your technique a try. I let mine dry near my heater and it takes less than half a day to dry. Thanks for the great tut!
    http://teachdanz.blogspot.com

    Reply
  6. Becki says

    March 21, 2012 at 8:33 pm

    Isn’t it fun to make your own?!? Great ideas about the alcohol inks and Smooch Spritz. If I wasn’t so cheap I would probably buy and use those too. 😉

    Reply
  7. Bee's hive says

    March 22, 2012 at 1:30 am

    you impress me…you just impress me!

    Reply
  8. Becki says

    March 22, 2012 at 2:48 am

    You’re too sweet, Bee.

    Reply
  9. jessica says

    March 22, 2012 at 12:44 pm

    this is awesome! Thanks for sharing your picture tutorial!!

    Reply
  10. Ceci V. says

    March 23, 2012 at 3:10 pm

    Cool tutorial! I keep trying to make my own too but I am so cheap that I hate paying for shipping but I looked for Hug Snug locally and I can’t find it, the only place I have not looked at is Hobby Lobby, I hope I have luck and find Hug Snug there.

    BTW, I used to have that “embossing” tool and burned my paper lol and then left it cooling off when my DH burned his belly when he was trying to reach for the AC plug lol. Of course we sent it back to the store because we have small children sharing the crafting area with me, lol.

    Reply
  11. Anonymous says

    March 23, 2012 at 10:00 pm

    I so need to try this!! I like the cool texture and so cheap to make!! Great idea!!

    Trish ImaCutter

    Reply
  12. Becki says

    March 25, 2012 at 5:03 pm

    @Trish, it is so easy and fun to do. Let me know if you try it!

    @Jessica, thanks!

    @Ceci, I hope your hubby is OK. He might just tell you your hobby is too dangerous! I hung it up on my peg board one time too early and the tip of the barrel burned through the cord. hehe

    Reply
  13. Thienly Azim says

    April 9, 2012 at 3:25 am

    Oooh, I love crinkle ribbons! Thanks for sharing your wonderful tutorial with us! Me gotta try!

    Reply
  14. theresa calderini says

    July 27, 2012 at 1:20 pm

    Wonderful tutorial on doing this with distressing inks! I’m going to give it a try!! btw…I found you on Pinterest!

    Reply
  15. Rebecca Wagner says

    July 28, 2012 at 10:04 pm

    Thanks Thienly and Theresa! Gotta love Pinterest.

    Reply
  16. Gail Scott says

    August 25, 2015 at 8:17 am

    Just got into crinkle ribbon and love it – found our tutorial when searching for Crinkle Ribbon to purchased – ordered some to color and ordered a color BLACK which I use a lot – looking forward to trying your tutorial when my ribbon arrives – I did not think $3.99 shipping was bad since most shipping is around $7 – which I feel is outrages! Thanks for the tutorial! Have a blessed week!

    Reply

Leave a Reply Cancel reply

Your email address will not be published. Required fields are marked *

This site uses Akismet to reduce spam. Learn how your comment data is processed.

About the Designer

Hi, I'm Rebecca. I am a child of God. A loving wife of 29 years. A boy mom. A collector of gadgets, gizmos, and superhero action figures. Making the world more organized one planner at a time. Read More…

  • Facebook
  • Instagram
  • Pinterest
  • Twitter

Looking for Something?

Categories

Copyright

You are welcome to feature or share any article, as long as you use only one image and link back to the specific post. You may NOT edit, crop, remove my watermark, or change my images in any way without written permission.

Republishing posts in their entirety is prohibited. If I somehow produce something that inspires you to create your own, please credit me and link back to my site. Thanks!
  • Blog
  • Home
  • Tutorials
  • About Me
  • Contact Me
  • 3D Projects
  • CGP VIP Group

Join us on Instagram

✨ Flipping through the magic of October with the ✨ Flipping through the magic of October with these new Halloween-themed journaling prompts. 🍁🖤 Whether you’re diving deep into reflection or just savoring the season’s mystique, these cards are your autumn muse. Now available on our website for those who’ve been asking. Happy journaling! 🎃📖 #OctoberWhispers #JournalJourney #citygirlplanners #journalingprompts #journaling #octoberprompts
Unlock 2024 with style! ✨ Dive into the year wit Unlock 2024 with style! ✨ Dive into the year with our CityGirl Monthly Spiral Bound Planner 📖, Amethyst Geode cover edition. Sized 7” x 9” with a sleek 5/8” coil - simplicity and elegance combined! 💜

#PlannerAddict #PlannerLove #CityGirlPlanner #2024Goals #TrendingNow #ViralPick #SpiralPlannerLove #AmethystGeode #PlannerGlowUp #PlanWithMe #2024Ready #MonthlyPlanning #EleganceInPlanning #CoilPerfection #PlannerTrend
Popping out pillows because buying is too mainstre Popping out pillows because buying is too mainstream! 💨📦 When it’s cheaper to make your own air pillows than purchase! 😂 Click the link in bio to grab your perfect spiral planner packed with care! ✨ 

#AirPillowMadness #PackingGoals #PlannerAddict #SmallBusinessLove #ViralPost #TrendingNow #SavingCoins #BusinessBehindTheScenes #spiralplannerlove #citygirlplanners
Everyone loves pink, right? #comingsoon #pinkpink Everyone loves pink, right?

#comingsoon #pinkpinkpink #pinkplanner #pink #plannertabs #plannerstickers #stickerstabs #citygirlplanners
Witches brew, and plan too! Keep your eye on the ( Witches brew, and plan too! Keep your eye on the (crystal) ball for #WitchyPlans. 🌙🎃

#SneakPeek #CityGirlPlanners #PlanLikeAWitch #SpookyStationery #MagicalMoments #SpellboundPlanning #HauntinglyOrganized #PlanningCommunity #PlannerLove #NotepadAddict
Turning coffee breaks into a planner party with th Turning coffee breaks into a planner party with these Latte Love CityGirl notebooks. 📚☕️ Because pink and gold are always a match made in stationery heaven! ✨💖 #PlannerAddict #CityGirlPlanners #PinkAndGold #CoffeeLovers #DeskGoals #PlannerLove #PlanWithMe #PlannerCommunity #PlannerChic
Coming soon - October Journaling Cards!. These giv Coming soon - October Journaling Cards!. These give all the spooky vibes…perfect for the autumn season. I couldn’t wait to show you. So, I grabbed them fresh off the printer. These are full color but the sneaks in black and white. We are still testing which card stock we want to use but they will be coated like playing cards. Should there be a November and December set too?

#bulletjournal #journaling #journalinspiration #journalcard #pocketcard #october #halloweenjournaling #carddeck #sneakpeek #newrelease #citygirlplanners #plannerlife #plannercommunity #fauxoilpainting
From fashionista to undead diva! 🧟‍♀️✨S From fashionista to undead diva! 🧟‍♀️✨Should I bring her to life as a vinyl sticker? Drop a 💚 if that’s a yes!

Artwork by @sav.nicholls321 

#artprogress #zombiedoll #artist #zombies #vinylsticker #citygirlplanners #planningcommunity #plannerstickers #plannernerd
Hey there, CityGirl family! Imagine your Spirals w Hey there, CityGirl family! Imagine your Spirals with a splash of color! Are you feeling the vibes?

We’re thinking of introducing a color theme add-on. From classic black to a spectrum of choices.

But here’s the twist: We need YOUR take! Should we dive into this colorful journey together?

Give us a double click if you love the idea or drop your thoughts in the comments. We’re all ears!

#citygirlspiral #citygirlplanners #funcolors #planningcommunity #planningtime #plannerlove
Follow Us!

Categories

Archives

Copyright © 2023 · HappyCardFactory Designs