HappyCardFactory Designs

Dream. Create. Inspire.

  • Shop
  • Facebook
  • Pinterest
  • Twitter
  • Instagram
  • Home
  • Our Store
  • Blog
  • Tutorials
  • 3D Projects
    • 3D Crafts
    • 3D Flowers
    • 3D Letters
  • Contact
  • About Me
    • About Me
    • Disclosure
    • Privacy Policy
  • Join Our Group
You are here: Home / Trendy Twine / Witchy Shaker Card

Witchy Shaker Card

September 24, 2011 by Rebecca Wagner 5 Comments

Hi everyone!  I pray you are having a great Saturday.  I know I am.  The boys are out and I have the house to myself for a little while so I better throw this post up and get to cleaning.I have had this idea “shaking” around in my head ever since I saw Lenae’s shaker card.  She did an amazing job and has a great tutorial on how to put the card together with a free SVG template to download.  I won’t go over it here when she explains it pretty clear on her blog.  I also am not that good at following directions, so mine didn’t come out as great as hers.  But I tried.  Now I have a general idea of how it is to be assembled, next time I am sure my card will come out better.

As you can see I went with a Halloween theme.  I have been bursting with ideas ever since I saw Bee’s new Bee Witching Halloween Collection.  There are so many elements in this set.  Almost everything you need to complete all your spooky holiday crafts.

For the background in the window, I printed out Bee’s witch and the clouds that surround the mountains.  I had the mountains in there but it just made it too busy.  I used the print function in Make The Cut because the witch and clouds are actually SVG files.  That’s the great thing about Make the Cut, I can bring almost any type file to my mat and use them in several different ways.  I also could have brought a texture in and added a little more pizazz to my witch.  But you guys know I am a slacker at heart.  So I kept her just the way Bee intended.  ^__^   The window itself is the tag from The Digi Bistro’s Halloween Town set.  The original file has a shell for the window.  I used the new node editing feature to delete and replace with the tag file, then joined them together.

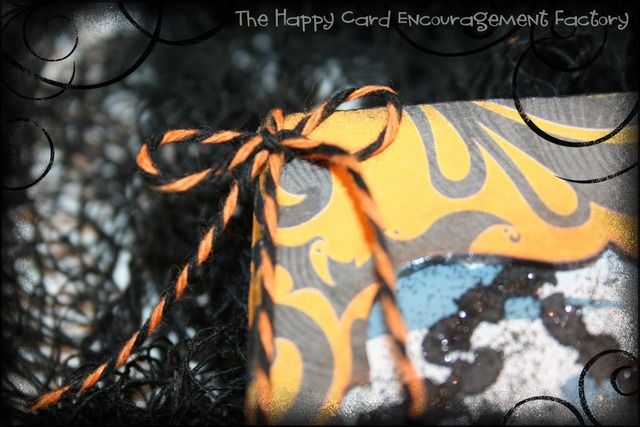
I also used Bee’s little bat to have them fly around in the clouds.  Since I was going to cut him so small, I took out his face (sounds kinda sick doesn’t it?).  Using them in the shaker part, he would have lost all his features anyway.  Lenae used Shrinky Dink material for her butterflies.  I just cut the little guys out, threw them in and let them fend for themselves.  It is a thicker cardstock and I haven’t had any bending of their wings.  So I think I am good.  My husband couldn’t tell that they were bats, so I think next time I will use an orange or purple glitter to mix in depending on the color paper I use for contrast. Again, I had to use Lesley’s super amazing Trendy Twine in Orange Licorice.  Perfect for all Halloween projects.  It’s only available for a limited time so go snatch it up before it’s gone!

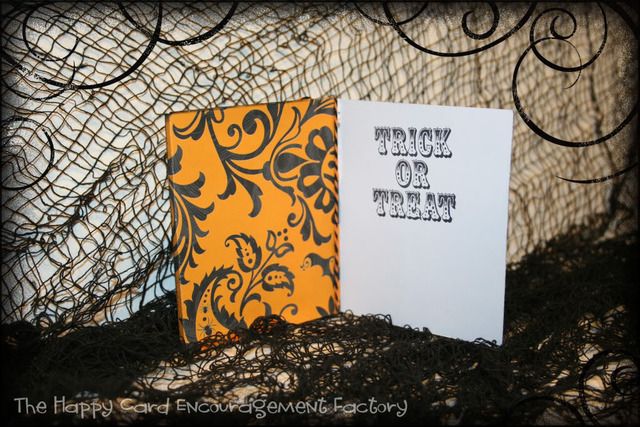
Another thing you guys might like to know:  I can’t stamp for the life of me!  I never used stamps before now, not even the foam ones as a child.  I have just started using stamps since my husband gave me a Teresa Collins Stamp maker for our anniversary.  I never use it or the stamps but I am trying to get into the habit.  But as you can see from the picture above I need lots of practice.  I guess it could have been crookeder (is that even a word?). Haha, but I think the recipient of this card will get the point.

Here is just another shot.  Even though I didn’t follow Lenae’s directions to a “T”, I think my little shaker came out pretty good.  Please go check out Lenae’s adorable blog: SugarGems Crafts.  She has tons more of ideas and pretty cards.  She makes a lot with cupcakes, one of my favorite things.  Well, sugar in general is but I won’t get into that now.

If you guys ever need help with all the cool new features of Make the Cut, there is a great Yahoo! group called MTC_Tuts and the official Make the Cut forum.  Both are wonderful for getting the most out of this great program.  Andy has added so much recently I know I am not using it to it’s full potential.  Hope you had fun looking around and have been inspired.  It was great to have your here!

Supplies used:

Recollections Midnight Magic stack (base card)
Bee Witching Halloween Collection by SVGs by Bee (witch, clouds, bats)
Martha Stewart Glitterin Onyx
Trendy Twine in Orange Licorice
Halloween Town by The Digi Bistro (tag shaped window)

Filed Under: Bee Witching Halloween, Make the Cut, Recollections, Shaker card, Trendy Twine

« 12 and Swell
Big News from Boss Kut »

Comments

  1. Bee's hive says

    September 25, 2011 at 3:40 am

    This came out so cute! I love all the different svgs you used…but they come together so beautifully!

    Reply
  2. Bee Burg says

    September 25, 2011 at 3:56 am

    Oh I love this! This is awesomely cute. I have never tried a shaker card, they look so fun though!…
    And I am so jealous, I want MTC too! LOL I can’t believe you can print svgs that’s so awesome. Lately with LD I find myself torn because I like the svgs but they’re time consuming so I want to buy the graphics but don’t have a machine with print & cut feature yet… Once I get MTC I will be able to buy svgs and use them both ways! Now this news made my day… LOL

    Reply
  3. SugarGem says

    September 25, 2011 at 8:50 am

    Oh my gosh! So flipping darling. I think we all start thinking the same lol. I started a new svg shaker today. It will be more universal than the shell. I will post it soon! :). I gotta try the non shrinky dink style next. Thank you for sharing your so sweet.

    Reply
  4. Dee's Craft Room says

    October 2, 2011 at 1:50 pm

    Your card came out really well, I love the glitter mix!

    Thanks for playing along with us at Crafty Boots Challenge.

    Dionne

    Reply
  5. scrap joanny says

    October 2, 2011 at 4:34 pm

    very nice card – Thanks for playing with Lollipop ! hugs Joanna

    Reply

Leave a Reply Cancel reply

Your email address will not be published. Required fields are marked *

This site uses Akismet to reduce spam. Learn how your comment data is processed.

About the Designer

Hi, I'm Rebecca. I am a child of God. A loving wife of 29 years. A boy mom. A collector of gadgets, gizmos, and superhero action figures. Making the world more organized one planner at a time. Read More…

  • Facebook
  • Instagram
  • Pinterest
  • Twitter

Looking for Something?

Categories

Copyright

You are welcome to feature or share any article, as long as you use only one image and link back to the specific post. You may NOT edit, crop, remove my watermark, or change my images in any way without written permission.

Republishing posts in their entirety is prohibited. If I somehow produce something that inspires you to create your own, please credit me and link back to my site. Thanks!
  • Blog
  • Home
  • Tutorials
  • About Me
  • Contact Me
  • 3D Projects
  • CGP VIP Group

Join us on Instagram

Some days the bar is high. Some days the bar is si Some days the bar is high.
Some days the bar is simply… still here.

And that’s something.

Meet the Still Here Notepad.
A gentle reset for the days that hurt, when the smallest wins still count.

Because sometimes the most important thing you do all day…
is keep going.

#citygirlplanners #plannerlove #notepad
We’ve got some good ones! #citygirlplanners #pl We’ve got some good ones!

#citygirlplanners #plannercommunity #plannerrefills #plannerstuff
Just waiting on that UAP info to drop. 🤔😏 # Just waiting on that UAP info to drop. 🤔😏

#unicornsfromuranus #citygirlplanners #plannerlife #stationerylove
So, I did a thing. Working on a pain point for Per So, I did a thing. Working on a pain point for Personal size. This is for those of you who think it’s too narrow but don’t want to purchase a new PW binder. Franklin Covey Compact is the next best thing. 

If you have a FFC binder already, we now will have refills for you too! 

#franklincoveycompact #citygirlplanners #personalringplanner #lvmmagenda
Foil lovers... we heard you. Since our foil equi Foil lovers... we heard you. 

Since our foil equipment went down, the messages and emails have not stopped. We know how much you love the look and honestly we love it too.

Replacing commercial foil equipment runs into the tens of thousands of dollars and, like a lot of small businesses right now, that's just not realistic. 

After months of testing with our existing setup, we think we found a way to bring foil back.

It's not mass factory perfect. Occasionally there may be a tiny spot where the foil doesn't pull 100%. Nothing obvious, nothing we wouldn't personally use, and nothing that doesn't meet our standards will ship.

But overall? We think it looks pretty gorgeous.

Before we officially bring foil back…

Would you still want it knowing it's handcrafted and not machine perfect? 

Tell me honestly in the comments. Your feedback will decide this one. 

#foilinserts #foilingtechnique #citygirlplannersinserts #citygirlplanners
Now on to the cutting phase. #citygirlplanners # Now on to the cutting phase. 

#citygirlplanners #stationerylove #plannercommunity #behindthescenes
New notepads in the making. Any guesses? #citygir New notepads in the making. Any guesses?

#citygirlplanners #plannercommunity #plannerlove #citygirlplannersinserts
Nothing ruins a perfectly good month like… bills Nothing ruins a perfectly good month like… bills.

Good news: when everything’s written down, at least the chaos is organized.

Pay it. Check it off. Pretend you’re thriving.

#CityGirlPlanners #AdultingButMakeItCute #BillTracker #PlannerLife #OrganizedChaos
Personal Size planners get a bad rap for one reaso Personal Size planners get a bad rap for one reason…

They’re narrow.

And I get it.
Personal is the perfect middle ground. Bigger than Pocket, fits in your purse, but way more portable than A5.

But the width?
That’s always been the complaint.

Lately I’ve been seeing people try to squeeze Personal Wide into standard Personal binders… and then wonder why the pages stick out.

So instead of making it wider… I went the other direction.

Foldouts.

For 2026, I reworked the layout to give you more planning space without changing the footprint.

Month on one page
Straight into your weekly
Dashboard space (because you know I had to keep that)
And when it’s folded?
Standard Personal Size. Fits your binder like it should.

Now I need your opinion before I finalize this…

What works better in vertical boxes?

Graph (left side)
or
Lines (right side)

Tell me in the comments — Graph or Lines?
Follow Us!

Categories

Archives

Copyright © 2026 · HappyCardFactory Designs