When you have a electronic die-cut machine, you can do so much more than just paper crafts. It can help make any craft project easier. In this case, I made perfect sized 12″circle templates with my Boss Kut Gazelle. Let’s just say my wrists thank you, Pink Lady! Let me show you how to make these adorable pom-poms out of tulle. I like these much better than the paper ones and I think they are much easier to make. Perfect for that bridal shower you were asked to help with at the last minute 😀 But don’t worry, it only takes about 25 minutes to make six. Maybe even less than that. Can’t go wrong with pretties that are quick and easy.
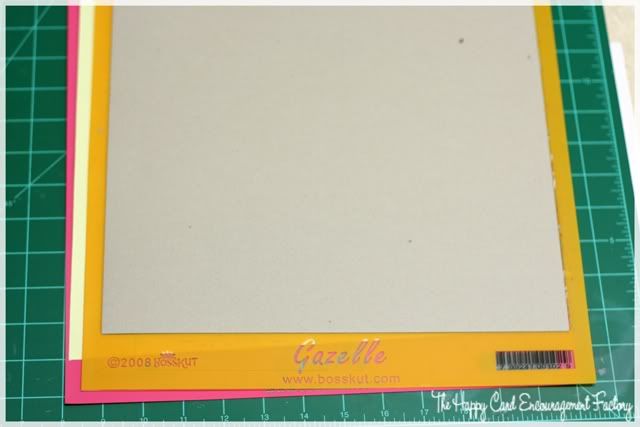
Remember, you don’t have to use a die cutter. I’m just lazy so I used mine to save my hands and scissors from having to cut the chipboard. If you are using your cutter, make sure you either tape it down or use a super sticky mat like I have here. Cut two circles to make your pom-poms.
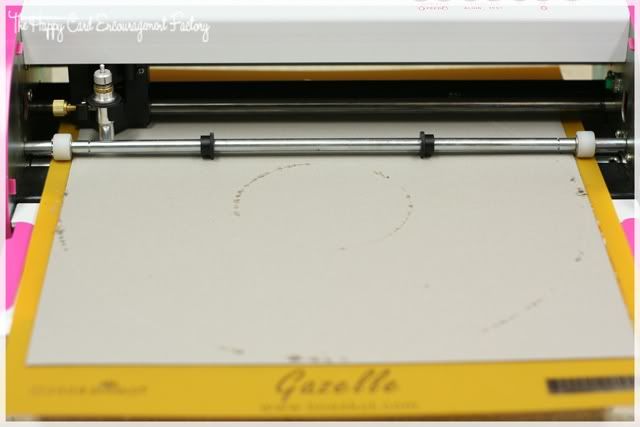
I cut out a 4″ circle within a 12″ one. My inner circle is probably a little too big but I wanted to make sure I could thread my spool easily. I did use a 2x multi-cut just to be on the safe side.
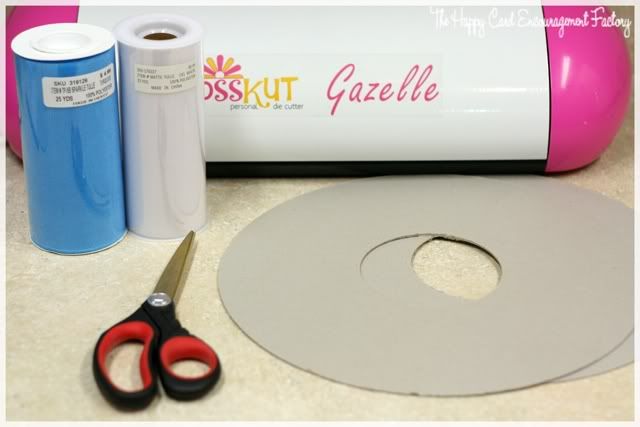
Now you have a perfect template which makes some pretty round poms. Means less trimming later on. Get the rest of your supplies and start with making the happiness. I used the tulle spools widely available at big box craft stores.

The spools I purchased are 6″ by 25 yards. I wrapped the tulle around my template four times. Which gave me three poms a spool. I used binder clips to hold the tulle to the chipboard for cutting.
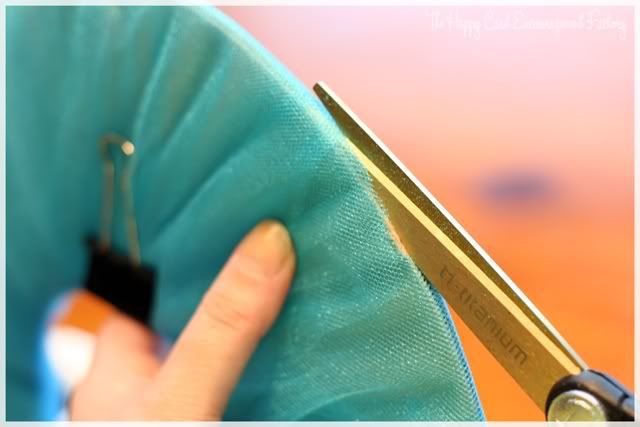
Start cutting the tulle all the way around. After your tulle is cut, carefully slip your thread in between the two pieces of chipboard. I would normally use fishing line so they look like they are floating in air but I was too lazy to fish it out of the garage. (Yes, I went there.)
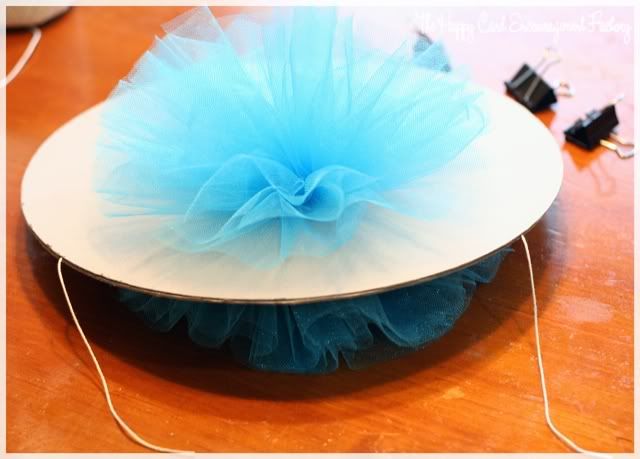
Once I had the thread in between the boards but before tightening, I took my clips off. Then just pull your thread as tight as you can without breaking it. Slip it out of the template and there you have your adorable little pom-pom. I usually wrap the thread around a couple of times just to make sure it stays together. The only thing left is to fluff up the ball and hang.
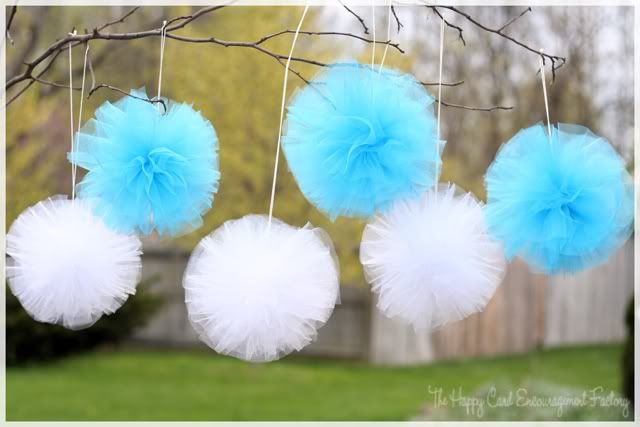
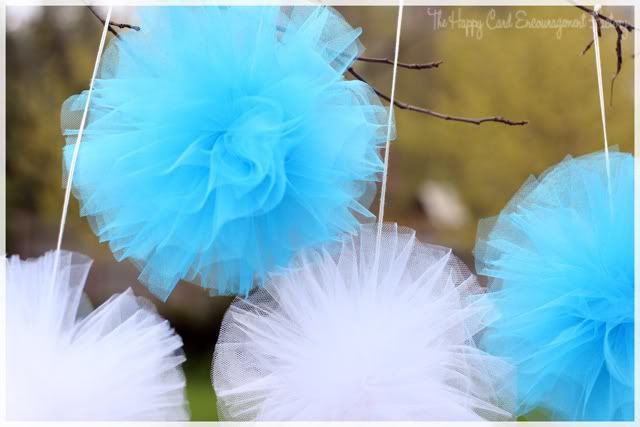
Here they are in all their cutesy glory. Aren’t they just the bee’s knees? Love them and I hope the bride-to-be enjoys these at her shower this month! Another cool thing is I have sturdy templates to use over and over again. Because trust me, I WILL be making these again. Probably for all our church events. Do you think these would be weird for a teen boy’s graduation party? LOL
Did I forget anything? Something not make sense? Let me know in the comments. It’s late as I am writing this and with my son watching TV, he has David Boreanaz distracting me. ^__^
Supplies:
Tulle roll (6″ x 25 yds) in color of choice
12″ circle template made out of cardboard (chipboard or cereal box works great)
thread to tie off
scissors

Oh, these are just darling! They look so delicate, what a perfect party addition! I may have to make some for my sister’s garden wedding!
These are so fun, I love them. You are so creative with all of your fun projects. By the way, I just looked up your post on the homemade daubers and my hubby is finally cutting them for me. Thanks for the tips and inspiration you provide!
Considering you cannot get helium anymore! (Yes it is endangered) this is amazing and I think a perfect replacement for Balloons:)
How awesome, I’m gonna have to try this!!
Thanks for stopping by and the kind comments, everyone.
Dhilly, you are going to love the daubers!
Hello, these are too cool! I like these a lot and if you wouldn’t mind I would like to learn how to make these and possibly sell the ones I make? Is that OK? Also what do you do you missed a couple of steps? How do you begin to get the tulle onto the circle cut out of cardboard? Then where did the thread come in at?And what do you do with the thread so it pulls the tulle? I’m racking my brain trying to visualize you making them. AHHHH! Anyway…if you would be so kind as to fill me in I would be extremely grateful! THANK YOU!
Yes, you may sell the ones you make! Just make sure to post a few pictures to my Facebook page so I can see the wonderful little puffs!
How I start to put the tulle onto the cardboard is just hold the end piece even with the edge of the circle and wrap. Eventually after wrapping it around it will hold the end in place. Once you have it wrapped around as many times as you want, I use butterfly clips from the office supply store in the middle to hold my tulle in place while cutting (see picture 5 from top). Start cutting the tulle all the way around. After your tulle is cut, carefully slip your thread IN BETWEEN the two pieces of chipboard (see picture 7 from top).
Once I had the thread in between the boards but before tightening, I took my clips off. Then just pull your thread as tight as you can without breaking it. Slip it out of the template and there you have your adorable little pom-pom. Hope this helps!